


Prepare and Protect
Before you begin the cleaning process, it's crucial to take preparatory steps for both yourself and the screen door. Experts strongly advise wearing a mask,
particularly an N95 or two layered regular masks, to avoid inhaling accumulated dust and allergens, especially if the screen hasn't been cleaned in a long time. This simple precaution can significantly improve your comfort and safety during the task. Following this, the initial step involves removing any loose debris. For this, a handheld vacuum with a brush attachment or a regular vacuum cleaner is recommended. You should meticulously go over both sides of the screen, paying close attention to the corners and the frame where dust, cobwebs, and pollen tend to congregate. Alternatively, specialized mesh cleaning tools or brushes designed specifically for window screens can also be very effective for this dry dusting phase, making the job more efficient and less messy before introducing moisture.
Deep Clean the Mesh
Once the initial loose dust is cleared, it's time for a more thorough cleaning of the screen mesh itself. If the screen appears particularly grimy or still holds a significant amount of residue, a second wipe-down is recommended. For this, a soft-bristle brush or a high-quality microfiber cloth is ideal. You should work the cleaner over the mesh using gentle, circular motions. This action helps to dislodge stubborn particles and ensures a deeper clean than the initial dry dusting. This more intensive cleaning pass is key to revealing the true clarity of your screen and improving its ability to allow fresh air to pass through your home unobstructed. Remember to be gentle to avoid any potential damage to the delicate mesh material.
Address Frame and Floor
After tackling the screen mesh, your attention should shift to the surrounding elements. It's important to clean both the door frame and the floor area beneath it, as these parts accumulate a substantial amount of grime and dust that can be dislodged during the screen cleaning. Vacuuming the floor immediately after dry-cleaning the screen is essential to catch any falling debris. For the door frame, which harbors its own share of dirt, a practical approach is to use an all-purpose cleaner. Apply the cleaner to a cloth rather than directly onto the frame, and then wipe it down thoroughly. Don't forget the door tracks, as they are notorious for collecting dirt and dust that is tracked in from outdoors. A consistent cleaning of these areas prevents dirt from re-contaminating the freshly cleaned screen.
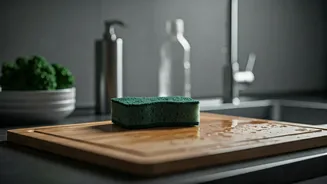
Suds and Scrub
With the dry debris effectively removed, the next phase involves introducing moisture and cleaning agents. The experts suggest preparing a cleaning solution by combining warm water with a few drops of dish soap. Continue to use a gentle circular motion with your cloth or sponge to clean the screen. It is vital to apply only moderate pressure to prevent stretching or damaging the screen material. For screens that cannot be removed from their frames, using a spray bottle to apply the soapy water can be particularly effective, allowing for controlled application. This wet cleaning step is crucial for lifting any remaining grime and leaving the screen truly spotless, ensuring a clear view and optimal airflow.
Air Dry and Maintain
The final step in the cleaning process is allowing the screen door to dry completely. If you were able to remove the screen from its frame for cleaning, it's best to let it air dry thoroughly before reattaching it. If the screen remains in place, ensure it dries completely before closing the door. This drying period is essential for preventing the formation of mildew and rust, which can degrade the screen over time. To help keep your screen door cleaner for longer and maintain its appearance, consider applying a furniture polish spray after it's dry; this adds shine and discourages dust from settling too quickly. Regular cleaning, especially during spring and fall, and promptly patching any weak spots will also extend its lifespan.