


Essential Ingredients Unveiled
To begin, gather the necessary ingredients. The recipe needs all-purpose flour for the structure, a touch of sugar to feed the yeast and add sweetness,
and salt to enhance the flavors and regulate yeast activity. The key ingredient is the yeast, which will make the buns rise and become fluffy; active dry yeast or instant yeast will work perfectly. Warm water will activate the yeast. Milk adds softness and richness, whilst oil keeps the buns soft. Some recipes may include a touch of butter or ghee for extra flavor and texture; this is entirely optional. It is crucial to have accurate measurements. When baking, precise amounts are crucial for perfect results, so use measuring cups and spoons.
Preparing the Dough
Start by activating the yeast. If using active dry yeast, mix it with warm water and a pinch of sugar. If using instant yeast, this step can be skipped. Let the yeast mixture sit for about 5-10 minutes until it becomes foamy, which indicates it's active. In a large bowl, combine the flour, sugar, and salt. Add the yeast mixture, milk, and oil. Mix until a shaggy dough forms. Transfer the dough to a lightly floured surface and knead for about 8-10 minutes, until it becomes smooth and elastic. The kneading process develops the gluten, which is essential for the structure and texture of the pav buns. If the dough is too sticky, add a little flour at a time until it's manageable. Shape the dough into a ball and place it in a lightly oiled bowl. Cover it with a damp cloth or plastic wrap and let it rise in a warm place for about 1-1.5 hours, or until it has doubled in size. This initial rise is crucial for the buns to become light and airy.
Shaping the Buns
Once the dough has doubled in size, gently punch it down to release the air. Divide the dough into equal portions, depending on the desired size of your pav buns. Typically, each portion should weigh around 50-60 grams. Roll each portion into a smooth ball. Place the balls onto a baking tray lined with parchment paper, leaving some space between each bun. The space allows them to rise and expand without sticking together. Cover the tray with a damp cloth or plastic wrap and let the buns rise for another 30-45 minutes. This second rise ensures the buns are light and fluffy.
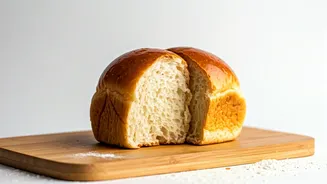
Baking the Perfection
Preheat your oven to 180°C (350°F). Brush the tops of the risen buns with milk or melted butter for a golden color and a soft crust. This is optional but highly recommended for an appealing appearance. Bake the buns for about 15-20 minutes, or until they are golden brown on top. Keep an eye on them during the final few minutes of baking to prevent over-browning. Once baked, remove the buns from the oven and let them cool on a wire rack. Cooling is very important because it enables the buns to release steam and prevent a gummy texture. Brushing the buns with melted butter while they are still warm gives them a soft crust.
Serving and Enjoying
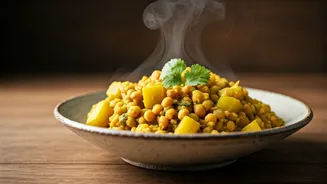
Once the pav buns have cooled, they are ready to be enjoyed. The most common way to eat pav is with vada pav or bhaji pav. You can also toast them lightly before serving. Pav buns taste the best when they are fresh. You can also store them in an airtight container at room temperature for up to two days. Enjoy your homemade eggless pav buns with your favorite fillings! Experiment with different fillings and make your own special recipes. These homemade pav buns are a perfect accompaniment to a variety of Indian snacks.