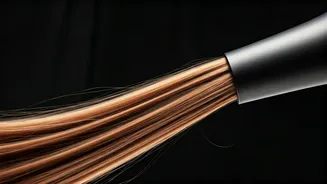


Prep is Key
The foundation for a flawless blowout begins long before you even pick up your hair dryer. Proper preparation is essential for protecting your hair from
heat damage and ensuring a smooth, long-lasting style. Begin by washing your hair with a gentle, hydrating shampoo and conditioner suited to your hair type. Gently towel-dry your hair, removing excess water. Before using any heat, it’s best to let your hair air dry as much as possible, as this minimizes the time it's exposed to heat. The less time your hair spends under the dryer, the less damage it sustains. Once your hair is mostly dry, apply a heat protectant. This acts as a shield against the intense heat, helping to prevent split ends, breakage, and dryness, all of which compromise the look of a perfect blowout. A good heat protectant will also help create a smoother, more polished finish.
Heat Protectant Application
Heat protectant is a non-negotiable step in the blowout process, acting as a crucial barrier between your hair and the high temperatures of your dryer. This vital product minimizes heat damage, which can lead to dryness, breakage, and split ends. Before reaching for your hair dryer, distribute the heat protectant evenly throughout your damp hair, focusing on the mid-lengths and ends, where your hair is most prone to damage. You can find heat protectants in various forms, including sprays, creams, and serums. Each type offers different benefits, depending on your hair type and the desired outcome. For fine hair, a lightweight spray may be best to avoid weighing it down, while thicker hair might benefit from a richer cream or serum. Ensure that you saturate each strand, creating a protective layer that helps maintain moisture and ensures the longevity of your style.
Drying in Sections
To achieve a truly salon-worthy blowout, it’s essential to dry your hair in sections. This methodical approach ensures that each part of your hair receives focused attention, promoting a more even and polished finish. Divide your hair into manageable sections using clips; the number of sections depends on your hair's thickness and length. Thicker hair will benefit from smaller sections to ensure thorough drying, while thinner hair might require fewer. Starting at the roots of each section, direct the nozzle of your hair dryer downwards, allowing the airflow to smooth the hair cuticle. Use a round brush to create tension as you dry, gently pulling the hair taut to eliminate frizz and create volume. As you work your way through each section, focus on achieving a smooth, sleek result from roots to ends. Ensure each section is completely dry before moving on to the next one to avoid humidity causing frizz or uneven styling.
Mostly Dry First
Before you start the actual styling with your hair dryer, make sure your hair is mostly dry. This initial step is a game-changer for preserving the health of your hair and achieving a lasting blowout. Allowing your hair to air dry, or using a low-heat setting on your dryer until it is roughly 70-80% dry, reduces the amount of time it spends exposed to intense heat. This simple practice significantly lowers the risk of heat damage, which can lead to dryness, breakage, and a dull appearance. When your hair is less saturated with water, it also requires less time under the dryer, helping to minimize exposure and maximize the effectiveness of your styling efforts. Once your hair is mostly dry, it becomes easier to shape and style with a brush and the dryer. This also means you'll have more control over the finished look, resulting in a sleeker, shinier, and more voluminous blowout.
Blowout Brilliance
After mastering the key preparation steps, you’re ready to bring the blowout to life. Employ a round brush with a barrel size appropriate for the desired level of volume and curl. If you want more volume, use a larger barrel; if a smoother finish is what you seek, choose a smaller size. Start by working in sections, using the brush to lift each section at the roots while directing the hair dryer's nozzle downwards. This technique creates volume and prevents a flat, lifeless style. As you dry, rotate the brush, pulling it downwards and outwards to smooth the hair cuticle and add a touch of curl at the ends. This technique not only imparts shine but also tames frizz. As you work through the sections, maintaining consistent tension with the brush will result in a sleek, polished look. Once each section is dry and styled, finish with a final blast of cool air to set the style and boost shine.