


The Root of the Problem: Starch and Water
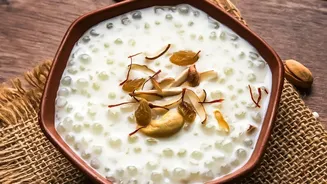
The primary reason Sabudana Khichdi becomes sticky is simple: excess starch and improper water management. Sabudana, or tapioca pearls, are nearly pure starch. When this starch is exposed to too much water and then heat, it gelatinises, creating a gluey,
sticky texture that binds the pearls together. The secret to a 'khila khila' (fluffy and separate) khichdi isn't in a complicated cooking process but in the careful preparation that happens long before the pan gets hot. Mastering the pre-cooking steps is the key to ensuring each pearl remains distinct and perfectly cooked.
Step 1: The All-Important Rinse
Before you even think about soaking, you must wash the sabudana. This is a non-negotiable step. The pearls are covered in a fine, powdery starch from the manufacturing process. If not washed away, this surface starch will create a sticky film the moment it hits a hot pan. To do this correctly, place the sabudana in a colander or a large bowl and rinse it under running water two to three times, gently rubbing the pearls with your fingers. Continue until the water runs clear, not milky or white. This initial rinse is your first line of defence against stickiness.
Step 2: The Art of Soaking
This is where most cooks go wrong. Unlike soaking lentils or rice, sabudana requires a very precise amount of water. Using too much will cause the pearls to absorb excess moisture and turn mushy. The golden rule is to use just enough water to cover the pearls, about a 1:1 ratio of sabudana to water, or ensuring the water level is no more than half an inch to an inch above the sabudana. After adding water, let it soak for about 4-6 hours. Some varieties may need more or less time, so the 'press test' is crucial. A perfectly soaked pearl should mash completely when pressed between your thumb and forefinger, with no hard centre remaining.
Step 3: Drain, Dry, and Prepare
Even with perfect soaking, some residual moisture can remain. After the soaking period, it is essential to drain any and all excess water. Tip the soaked sabudana into a colander and let it sit for at least 15-30 minutes. This allows any lingering water to drain away, leaving you with plump but relatively dry pearls. For extra insurance, you can spread the soaked pearls on a plate or paper towel to air dry further. At this stage, many experienced cooks mix in coarsely ground roasted peanuts. The peanut powder not only adds flavour but also helps absorb any final traces of moisture, coating the pearls and preventing them from sticking together in the pan.
Step 4: The Final Cook
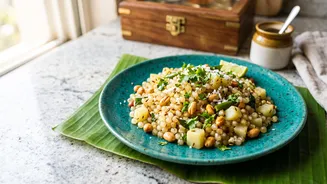
When it's time to cook, use a non-stick pan if possible and be generous with your ghee or oil, as this creates a barrier around the pearls. Cook on a medium-low flame. First, temper your spices like cumin seeds and green chillies, then add boiled and cubed potatoes. Sauté the potatoes until they are slightly golden before adding the sabudana. Once the sabudana is in the pan, the goal is to cook it quickly. Do not over-stir, which can break the pearls and release more starch. Instead, gently fold the mixture. Cook only for a few minutes, just until the pearls turn translucent. Overcooking is a common mistake that will make even perfectly prepped sabudana turn sticky. Finally, turn off the heat and finish with a squeeze of lemon juice, which helps to separate any pearls that may have clumped.