




Start With The Right Foundation
The secret to a great bun that lasts isn't about pulling your hair tight; it's about starting with the right texture. This style works best on hair that isn’t freshly washed. Second or third-day hair naturally has more grip and hold. If your hair is clean
and silky, don't worry. You can easily add texture by spritzing a dry shampoo or a texturizing spray through your roots and mid-lengths. This simple step prevents the hair from being too slippery, which is often why buns loosen and fall throughout the day. Don't aim for a perfectly smooth, combed-back look at this stage. A little natural volume and grit are your friends here, creating a foundation that will hold the bun securely while still looking soft and effortless.
Gather and Secure The Low Ponytail
Once your hair is prepped, the next step is to form the base. Decide on your parting—a center part offers a classic, balanced look, while a deep side part can create a more dramatic and elegant feel. Gently gather your hair at the nape of your neck. Don't pull it too tightly; you want to maintain some softness around the crown. Secure it with a good quality elastic hair tie. This ponytail is the anchor for your entire style, so make sure it feels snug without being restrictive. At this point, you can gently tug on the hair at the crown to create a little more volume and prevent the style from looking too flat or severe. This is also the moment you'll decide which strands to leave out around your face.
The Art of The Face-Framing Strand
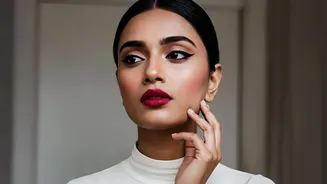
The loose strands are what elevate this style from a simple bun to a soft, romantic updo. Before you twist your ponytail into a bun, pull out a few thin pieces of hair from around your hairline. The key is to be intentional. Select strands that will flatter your face shape. For rounder faces, longer layers that fall below the cheekbones can be elongating. For square or more angular jawlines, softer, wispier tendrils can add a delicate touch. Avoid pulling out thick, heavy chunks of hair. Instead, aim for lighter pieces that will move naturally. If you have bangs or shorter layers, these are perfect candidates. You can give these pieces a gentle curl with an iron or simply shape them with your fingers to ensure they don't hang straight down.
Twist and Form Your Perfect Bun
Now, it's time to create the bun itself. There are several easy methods. One popular technique is to twist the entire ponytail from base to ends, then wrap the twisted hair around the elastic, tucking the ends underneath. Secure the bun with another hair tie or several bobby pins. For a 'messier' or fuller look, you can loop your ponytail through the elastic but only pull it halfway through on the final loop, leaving the ends out. Then, wrap the remaining ends around the base and pin them in place. Once the bun is secured, you can gently pull on different sections of it to fan it out, adding volume and enhancing the 'undone' aesthetic. The goal is a bun that feels secure but looks relaxed.
Lock It In and Make It Last
The final step is to ensure your perfectly imperfect bun stays in place. Use bobby pins to anchor any loose parts of the bun to the hair at your scalp. Instead of just pushing them in, try to catch hair from both the bun and the base for a stronger hold. If certain sections feel too loose or the bun feels heavy, a few strategically placed pins can make all the difference. Once you're happy with the shape, finish with a light mist of hairspray. This will help tame any unwanted flyaways without making the style look stiff or crunchy. The hairspray will provide hold while allowing the face-framing pieces to maintain their soft, natural movement.