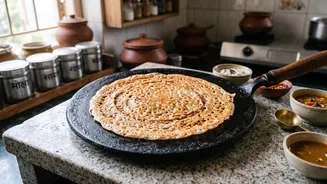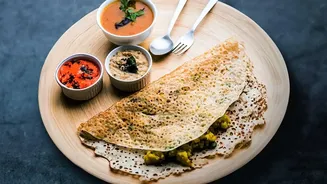






The pursuit of the perfect, paper-thin, crispy dosa often ends in frustration, with batter stubbornly clinging to the pan. But the coveted texture and flavour of a restaurant-style dosa are achievable at home, and the secret lies in your cast iron tawa.
Why Cast Iron Reigns Supreme
While non-stick pans offer convenience, traditionalists and chefs alike swear by cast iron tawas for a reason. Cast iron excels at retaining and distributing heat evenly across its entire surface. This steady, consistent heat is crucial for cooking the dosa uniformly, preventing the dreaded combination of burnt spots and soggy patches. Furthermore, a well-maintained cast iron pan develops a natural non-stick surface, known as a patina, through a process called seasoning. This layer of polymerized oil not only ensures the dosa releases cleanly but also improves with every use, making your tawa a lifelong kitchen companion.
The Crucial First Step: Seasoning
A new cast iron tawa needs to be seasoned before its first use to create that essential non-stick layer. If your tawa is unseasoned, start by washing it with mild soap and water to remove any factory coating, then dry it completely on a low flame. Apply a thin, even layer of a high-smoke-point oil, like sesame or groundnut oil, over the entire surface. Heat the tawa on a medium flame for 10-15 minutes until it begins to smoke lightly, then let it cool completely. Repeating this process two or three times will build a robust, slick patina that is the foundation for perfect dosas. For a pan that's already in use but has started to stick, this re-seasoning process can restore its surface.
The Heat Control Dance
This is where the magic happens. The primary reason dosas stick is incorrect temperature. A tawa that is too cold will cause the batter to cling and turn soft, while a tawa that is too hot will seize the batter instantly, making it impossible to spread and causing it to burn. To find the sweet spot, preheat your tawa on a medium flame for about 4-5 minutes. Test the temperature by sprinkling a few drops of water on the surface. If the drops sizzle, dance, and evaporate within seconds, you're ready to cook. If they just sit and boil, the pan needs more time. If they vanish instantly with a loud hiss, the pan is too hot. In that case, reduce the flame and sprinkle a bit more water to cool the surface down before wiping it clean.
The Pre_Dosa Ritual
Once your tawa is at the perfect temperature, there's one more trick for a flawless release. Before pouring the batter for each dosa, dip half an onion into a little oil and rub it firmly across the hot surface. This simple step does three things: it applies a micro_layer of oil, cleans off any residue, and the sulphur compounds in the onion help create a temporary non_stick shield. You can also use the top of a brinjal or a cloth dipped in oil. After this, lower the flame to medium_low. This slightly cooler temperature allows you just enough time to spread the batter thinly before it sets.
Technique and Patience
With the heat just right, pour a ladleful of room_temperature batter into the center of the tawa. Working quickly from the center outwards, use the back of the ladle to spread the batter in a single, continuous spiral motion. Aim for a thin, even layer without going back over the same spot. Once spread, drizzle a few drops of oil or ghee around the edges. Now, be patient. Don't try to lift the dosa prematurely. Wait until the edges begin to turn golden brown and lift away from the pan on their own. This is your signal that the dosa is cooked, crisp, and ready to be folded with an effortless slide of the spatula.