



First, Understand Your Leaf
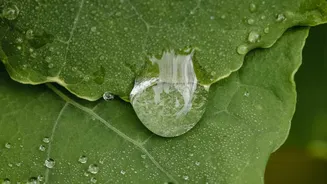
Before you even think about sealants, take a close look at your leaves. The success of your project begins with selecting the right specimens and understanding their properties. Look for freshly fallen leaves that are brightly colored and free of holes
or damage. Leaves that are already dry and brittle will only crumble, while damp leaves can lead to mold. The leaf's condition is paramount. A fresh, pliable leaf from a maple or oak, for instance, has a different moisture content and texture than a waxy magnolia leaf or a delicate fern frond. Fall leaves are ideal because their color pigments are stable, though some preservation methods work better for certain colors. For example, glycerin solutions are excellent at keeping yellows and oranges vibrant, while reds can sometimes bleed. Always ensure your leaves are completely dry and clean before you begin; you can press them inside a heavy book between sheets of paper for one to two weeks to flatten and dry them properly.
A Guide to Common Sealants
Once your leaves are prepped, it's time to choose your sealant. There is no single best option; the right choice depends on your desired finish and the leaf's final use. Decoupage glue, like the popular Mod Podge, is a fantastic all-in-one glue and sealer. It provides a durable, protective coating and comes in various finishes, from matte to gloss. For a quick and easy application, clear acrylic spray sealers are a great choice. They provide a protective top coat and can add an extra layer of durability, especially for delicate pressed leaves. For a more natural and pliable result, consider preserving leaves in a solution of one part vegetable glycerin and two parts water. This method allows the leaves to absorb the glycerin, replacing their natural moisture and keeping them soft for years. Another traditional method involves dipping leaves in melted paraffin or beeswax, which encases the leaf in a protective, translucent layer.
Matching Sealant to Your Project Surface
The final surface where your leaf will be displayed is a critical factor. A sealant that works for a scrapbook may fail on a glass vase. If you're mounting leaves on paper or cardstock, a decoupage medium like Mod Podge is ideal because it acts as both an adhesive and a top-coat sealer. You can apply it to the paper, place the leaf, and then seal over the top. For projects involving wood, a flexible sealant is key because wood expands and contracts. A siliconized acrylic or polyurethane sealant can adhere well to both the sealed leaf and the wooden surface. When decorating non-porous surfaces like glass or metal, adhesion is the main challenge. Here, a strong craft glue applied after the leaf has been sealed and dried is often necessary. For high-end projects, you can even embed sealed leaves in clear epoxy resin to create coasters, jewelry, or display blocks, offering a permanent, waterproof enclosure.
Application for a Flawless Finish
Proper application technique is just as important as your choice of sealant. For liquid sealants like Mod Podge or matte medium, use a soft brush and apply thin, even coats. It's best to coat the back of the leaf first, let it dry completely, and then coat the front. Applying multiple thin layers provides a stronger, smoother finish than one thick coat. When using spray sealants, work in a well-ventilated area and apply several light mists rather than a single heavy spray to avoid drips and ensure even coverage. For the glycerin method, ensure leaves are fully submerged for three to six days until they feel soft and pliable. With any method, patience is key. Rushing the drying process can trap moisture and ruin your project. Always allow each coat or step to cure fully before moving on to the next.