
Gather Your Tools and Prep Your Hair
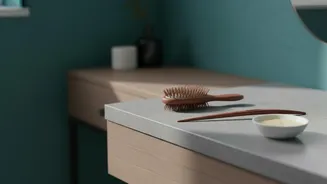
The beauty of this hairstyle lies in its simplicity. All you really need is a single pencil. A standard No. 2 pencil works wonderfully, but you can also use a pen, a chopstick, or a decorative hair stick. For the best results, this style tends to hold
better in hair that isn’t freshly washed. Day-old hair often has more texture and grip, which helps keep the bun secure. If your hair is very clean or silky, a light mist of texturizing spray or dry shampoo can provide the extra hold you need to prevent slipping. This preparation makes the twisting and securing process much smoother.
Create the Foundational Twist
First, gather your hair with your hands as if you're making a ponytail. You can position it high on your head, at the middle back, or low at the nape of your neck, depending on your preference. Holding the base firmly with one hand, use your other hand to twist the length of the ponytail tightly into a single, coiled rope. The tighter you make this initial twist, the more secure and compact your final bun will be. As you twist, the hair will naturally want to coil around itself. Guide this motion, wrapping the twisted rope of hair around its base to form a neat bun shape. Tuck the ends of your hair into the base of the bun.
The Weaving Technique for a Secure Hold
This is the crucial step that locks your style in place. Take the pencil and hold it ready. The most common and effective method is the simple weave. Push the pointed end of the pencil into the bun from one side, aiming towards your scalp at a slight downward angle. Weave it through the bun by pushing it up and down as you guide it across to the opposite side, making sure to catch hair from the base of the bun against your scalp. This motion works like a safety pin, anchoring the bun securely. The pencil should emerge on the other side. Adjust it so that it sticks out evenly on both ends for a balanced look.
An Alternative: The Inverted Tuck
For a slightly different look, you can try the inverted or flip-tuck method. Start with a low ponytail at the nape of your neck. Hold the pencil horizontally against your head just below the ponytail's base. Wrap your hair up and over the pencil. Then, rotate the pencil upwards, flipping the twist of hair with it, so the pencil's point is facing the ceiling. Finally, push the pencil's point down through the twist, keeping it close to your scalp until it feels secure and the bun is held in place. This creates a beautiful, slightly messier inverted bun with minimal effort.
Tips for Different Hair Types and Lengths
This style is incredibly versatile, but a few adjustments can help. For those with very long or thick hair, you may need a longer pencil or chopstick for a secure hold. You can also try a double-twist method by splitting your ponytail into two sections, twisting each one, and then coiling them together into a single bun before inserting the pencil. For those with shoulder-length or layered hair, a tighter initial twist is key to keeping shorter pieces contained. If you have very fine or slippery hair, a bobby pin placed discreetly underneath the bun can offer extra insurance against it coming loose.
Finishing Touches and Variations
Once your pencil bun is secure, you can customize it. For an effortless, 'undone' look, gently pull out a few small strands of hair around your face and from the bun itself. For a sleeker, more polished finish, tuck in any stray hairs. You can also experiment with a braided bun: simply braid your ponytail before twisting it into a bun and securing it with the pencil for added texture. Don't be afraid to use colorful pencils for a fun pop of color or elegant, decorative hair sticks to elevate the style for a more formal occasion.