







The Power Pushing Trio
At its core, the ring dip is a powerful pushing exercise. The primary movers are exactly what you'd expect: the pectoralis major (chest), the anterior deltoids (front of the shoulders), and the triceps brachii. During the lowering phase, these muscles
lengthen under tension, and on the way up, they contract forcefully to press your body back to the starting position. Leaning your torso slightly forward will place more emphasis on the chest, while keeping your body more upright shifts the focus to the triceps. But unlike a stable bar dip, that's just the beginning of the story.
Why Instability Is Your Friend
The defining characteristic of ring dips is the unstable nature of the gymnastic rings. Because the rings can move freely, your body has to work overtime to keep them steady. This forces a massive engagement of smaller stabilizing muscles around the shoulder joint, including the rotator cuff, as well as your core and even your biceps. This constant fight for control is what makes ring dips so challenging, but it's also what builds superior shoulder stability, coordination, and functional strength that translates well to other activities and can even help with injury prevention. Think of it as strength training with a built-in balance and control component.
How to Perform a Perfect Ring Dip
Proper form is crucial to get the benefits and avoid injury. Start by setting the rings about shoulder-width apart. Jump or step up into the 'support position': arms fully locked out, shoulders pulled down and back (not shrugged up by your ears), and rings turned slightly outward. This is your strong and stable starting point. To begin the dip, slowly lower yourself by bending your elbows. Keep the rings close to your body and control the descent until your shoulders are slightly lower than your elbows. Your torso can have a slight forward lean. Pause for a moment at the bottom, then press forcefully back up to the starting support position, fully locking out your arms.
Common Mistakes to Avoid
Three common errors can sabotage your progress and increase injury risk. The first is not achieving a full range of motion, either by not going deep enough or not locking out at the top. This leaves strength gains on the table. The second is letting the shoulders dump or roll forward at the bottom of the dip, which puts the joint in a vulnerable position. Always aim to keep your chest up and shoulders back. The third mistake is letting the rings flare out too far from your body, which reduces control and puts undue stress on your joints. Focus on keeping your hands and elbows tucked in relatively close throughout the movement.
New to Rings? How to Progress
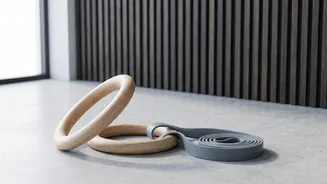
Few people can perform a perfect ring dip on their first try. The key is to build up strength and stability gradually. A great starting point is simply holding the top support position for time, aiming for sets of 20-30 seconds to build stability. From there, you can practice negative dips, where you use a box or your feet to get to the top position and then lower yourself as slowly and controlled as possible. Resistance bands can also be a fantastic tool; by looping a band over the rings and placing your knees or feet in it, you reduce the amount of bodyweight you have to lift, allowing you to practice the full movement pattern with good form.