






The Foundation: A Firm, Smooth Dough
The journey to a perfect poori begins long before it hits the hot oil. It starts with the dough. The ideal poori dough is firm and stiff, noticeably more so than the soft dough used for chapatis or rotis. A soft, sticky dough is the primary reason for pooris
that absorb too much oil and become greasy. To achieve the right consistency, add water gradually while kneading. You are looking for a dough that is smooth and tight, but not dry or crumbly. Adding a small amount of fine semolina (sooji or rava) can help create a crispier poori that holds its puffed shape for longer. Once kneaded, allow the dough to rest, but not for too long. A short rest of about 15 to 20 minutes is ideal. This brief period lets the gluten relax, making the dough easier to roll, but avoids letting it become too soft, which can lead to oily results.
The Critical Step: The Art of Even Rolling
Here is where the magic truly happens, and it is the step most often overlooked. For a poori to puff up perfectly, it must be rolled to an even thickness. If a poori is thinner in some spots and thicker in others, the steam created during frying cannot build up and inflate the bread uniformly. When you roll the dough, aim for a consistent thickness of about 1-2 millimetres all the way across. Too thin, and your poori will turn out hard and crispy like a papad; too thick, and it will remain dense and uncooked in the center. A common mistake is using dry flour for dusting, like you would for a roti. The excess flour burns in the hot oil, leaving behind dark specks and an unpleasant taste. Instead, lightly grease your rolling surface and the small dough balls with a few drops of oil. This prevents sticking and keeps your frying oil clean.
Temperature is Everything: The Frying Process
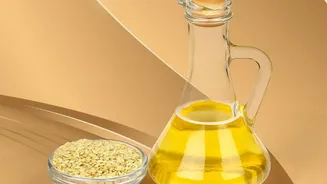
The temperature of the oil is non-negotiable for achieving a puffed poori. The oil must be hot enough to instantly seal the outer layer of the dough, trapping moisture inside which then turns to steam and causes the poori to inflate. The ideal temperature range is between 175°C and 190°C (350°F and 375°F). If you do not have a kitchen thermometer, you can test the oil by dropping a tiny piece of dough into it. If the dough sizzles and rises to the surface immediately, the oil is ready. If it sinks or takes too long to rise, the oil is too cold, which will result in flat, greasy pooris. If it browns instantly, the oil is too hot and will burn the outside before the inside cooks. Use an oil with a high smoke point, such as sunflower, groundnut, or vegetable oil, to prevent it from burning.
Technique in the Pan: The Gentle Press
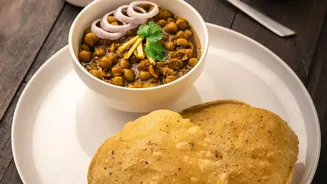
How you introduce the poori to the oil also matters. Gently slide the rolled-out disc into the oil from the side of the pan to prevent splashing and ensure it lays flat. As it starts to float to the surface, this is your moment to encourage the puff. Using the back of a slotted spoon or ladle, gently press down on the poori in a circular motion. This action helps force the steam to distribute evenly and pushes the poori to inflate fully. Once it puffs up, which should happen in a matter of seconds, flip it over to cook the other side until it is a light golden brown. The entire frying process for one poori should be quick, typically under a minute. Frying it for too long will make it hard and crispy.