




The Foundation: Soaking The Green Gram
The journey to a perfect chilla begins with selecting and soaking the right lentils. While many recipes use yellow moong dal, an authentic, hearty chilla often starts with whole green gram (sabut moong). This variety, with its skin intact, provides more
fibre and a slightly earthier flavour. The first crucial step is to rinse the green gram thoroughly under running water until the water is clear. This removes any dust or impurities. Once clean, the lentils need to be soaked. Soaking is non-negotiable; it softens the gram, making it possible to grind into a smooth batter and also aids in digestion. For best results, soak the lentils for at least eight hours, or simply leave them overnight. If you're short on time, a minimum of three to four hours in ample water will suffice. The lentils will visibly swell, doubling in size, which is your cue that they are ready for the next stage.
The Secret: Grinding The Perfect Batter
This is where the magic truly happens. The consistency of your batter is the single most important factor in achieving that coveted crispy edge. After soaking, drain the lentils completely and transfer them to a blender. To this, add your aromatics—a piece of ginger and a green chilli or two are classic additions that provide a fresh, zesty kick. Now, for the water. Add it gradually, starting with a small amount. You are aiming for a smooth, pourable batter that is neither too thick nor too thin. A batter that is too thick will be difficult to spread and result in a dense, heavy chilla. Conversely, a batter that's too watery will tear easily on the pan and won't develop a crisp texture. The ideal consistency should be like that of a pancake or dosa batter, able to coat the back of a spoon but still flow freely. For an extra guarantee of crispiness, some street vendors and home cooks add a tablespoon of rice flour or sooji (semolina) to the batter. Once blended, stir in salt, a pinch of turmeric for colour, and finely chopped coriander leaves.
The Technique: Mastering The Sizzle
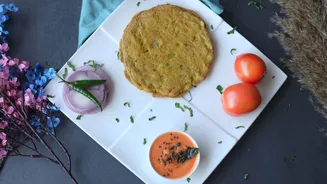
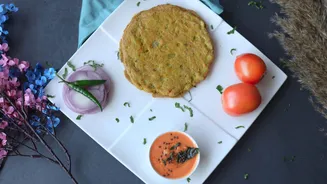
With the batter ready, it's time to cook. The right pan and temperature are key. A well-seasoned cast-iron tawa is traditional and excellent for developing a crisp crust, but a good non-stick pan will also work well. Heat the pan over a medium flame; it needs to be hot, but not smoking. A common test is to sprinkle a few drops of water on the surface; if they sizzle and evaporate immediately, the pan is ready. Lightly grease the tawa with a little oil or ghee. Take a ladleful of batter (about ¼ cup) and pour it onto the center of the pan. Working quickly, use the back of the ladle to spread the batter in a circular motion, moving from the center outwards to create a thin, even circle, much like making a dosa. Drizzle a little oil around the edges of the chilla as it cooks. This is crucial for getting those irresistibly crisp, golden-brown edges. Cook until the top surface looks set and the edges begin to lift away from the pan. This indicates the underside is cooked. Flip the chilla and cook for another minute on the other side until it has light golden spots.
The Finish: Fillings and Flavours
A plain moong chilla is delicious on its own, but the street-food experience is often elevated by a savory filling. The most popular choice is a simple yet flavourful mix of crumbled paneer. To prepare this, simply mix grated or crumbled paneer with finely chopped onions, green chillies, fresh coriander, and a sprinkle of salt. You can also add other finely chopped vegetables like tomatoes, capsicum, or grated carrots for extra crunch and nutrition. The filling should be added after you flip the chilla. Spread a generous amount over one half of the pancake while it's still on the tawa. Once the other side is cooked, simply fold the chilla in half over the filling, pressing down gently with a spatula. The heat from the chilla will gently warm the filling. Serve immediately, piping hot from the pan, for the best texture and taste.