






The Ancient Art of the Dot
Batik is a revered art form, especially in Indonesia, where it is a cornerstone of cultural heritage. The word 'Batik' itself is believed to come from the Javanese word 'ambatik,' which means a cloth with little dots. The suffix 'tik' translates to dot,
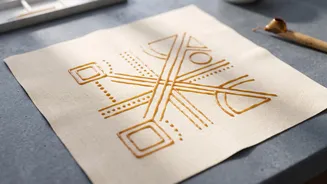
point, or drop. This tells you everything you need to know about the power of simple marks in this craft. Traditionally, artisans use a pen-like tool called a 'canting' to apply hot wax to fabric. This wax acts as a resist, protecting the covered areas from dye. When the wax is removed, the pattern is revealed. While master artisans create breathtakingly complex scenes, the foundation of many of these designs is a patient accumulation of simple lines and dots.
Your Beginner's Toolkit
Starting your Batik journey doesn't require a professional studio. A few key items will get you on your way. You'll need natural fiber fabric like cotton, which is easy for beginners. For the wax resist, a blend of beeswax and paraffin is common, and you can melt it in a small pot or a dedicated wax melting pot. To apply the wax, you can use a traditional canting tool for fine lines or even simple paintbrushes for broader strokes. You will also need fabric dye, a bucket for the dye bath, gloves, and an iron to melt off the wax at the end. It's wise to start with a small test piece of fabric to get a feel for how the wax flows and how the dye takes.
The Philosophy of Simple Forms
The beauty of starting with lines and dots is that it removes the pressure of drawing a perfect, complex image. It allows you to focus on the process and rhythm of the craft. Many traditional Batik motifs are built from these basic elements. The 'isen' are filler motifs, often composed of various dots and lines that add texture and depth to larger designs. Another classic pattern, 'Kawung', consists of four intersecting circles, creating a balanced and harmonious look that is easy for beginners to approximate. 'Cecek' or 'titik' are patterns made entirely of dots. By focusing on repeating these simple shapes, you can create fields of texture and rhythm that look incredibly sophisticated.
Your First Lines-and-Dots Project
Ready to try? Start with a small piece of cotton fabric, like a napkin or a bandana. First, lightly sketch a simple design with a pencil. Think in grids, waves, or spirals. Heat your wax until it is liquid but not smoking. Dip your canting or brush and draw your lines and dots onto the fabric, following your pencil marks. Remember, the wax must soak through the fabric to properly resist the dye. Once your waxing is complete and has cooled, it's time for color. Mix your fabric dye according to the package instructions and submerge your fabric. Let it soak until you achieve the desired shade. Finally, rinse and dry the fabric. To reveal your design, place the fabric between sheets of paper towel or newsprint and iron it; the paper will absorb the melting wax.
Building on the Basics
Once you are comfortable creating patterns with a single layer of wax and a single color, you can explore more advanced techniques. You can create multi-colored designs by repeating the process: wax, dye, then wax some more before dyeing again with a different color. You can also experiment with how you apply the wax. A wide brush can create bold stripes, while splattering wax can produce a lovely, organic dotted effect. You can even try using stamps or everyday objects like potato mashers to apply wax in a repeated pattern. Each tool will give your lines and dots a different character, expanding your creative vocabulary without adding much complexity to the process.