



Why This is Your Hosting Secret Weapon
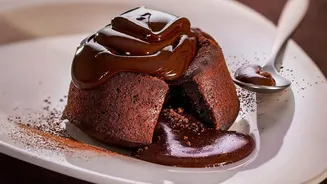
Entertaining should be about enjoying time with your guests, not being tethered to the stove. A make-ahead dessert like chocolate pudding frees you from the pressure of last-minute baking and preparation. Beyond just saving time, preparing your pudding a day
or two in advance allows the rich chocolate flavour to deepen and mature. It also means one less dish to worry about on the day, freeing up valuable oven and counter space. You can simply pull these elegant, pre-portioned desserts from the refrigerator, add a quick garnish, and serve. It's a simple strategy that delivers a huge payoff in calm and confidence, letting you be present for the moments that matter.
The Perfect Make-Ahead Pudding Recipe
This simple, no-fuss recipe uses common pantry staples to create a dessert that tastes anything but ordinary. It relies on cornstarch for thickening, making it more foolproof than egg-based custards. You will need: ¾ cup granulated sugar, ⅓ cup unsweetened cocoa powder, 3 tablespoons of cornstarch, ¼ teaspoon salt, 2 ¼ cups of whole milk, 2 tablespoons of butter, and 1 teaspoon of vanilla extract. Start by whisking the sugar, cocoa powder, cornstarch, and salt together in a medium saucepan to break up any lumps. Gradually pour in the cold milk while whisking until the mixture is smooth. Place the saucepan over medium heat and continue to whisk frequently as it heats up. Once it begins to bubble and thicken, keep whisking constantly for one full minute. Remove the pan from the heat and immediately stir in the butter and vanilla until the pudding is glossy and smooth. The pudding will thicken further as it cools.
Tips for Silky Smooth Success
The key to a perfect pudding texture is constant whisking and controlled heat. Using medium heat is crucial; if it's too high, the milk can scorch and the cornstarch can break down, preventing the pudding from thickening properly. Be sure to whisk constantly as the mixture comes to a boil, getting into the corners of the pan to prevent sticking. If you do end up with a few lumps despite your best efforts, you can easily fix it by pouring the finished pudding through a fine-mesh sieve before chilling. For a richer, more complex flavour, consider using high-quality Dutch-process cocoa powder or adding finely chopped dark chocolate along with the butter at the end.
Your Chilling and Storage Masterplan
Properly chilling your pudding is the most critical step for making it ahead. The goal is to cool it without allowing a rubbery 'skin' to form on the surface. The best method is to press a piece of plastic wrap or waxed paper directly onto the entire surface of the warm pudding immediately after cooking. This prevents air from coming into contact with the pudding, which is what causes the skin to develop. Once covered, the pudding can be refrigerated. It will need at least three to four hours to chill and set completely. For stress-free hosting, you can prepare it up to five days in advance, keeping it stored in an airtight container in the fridge. This makes it an incredibly reliable option for weekend events.
Elegant and Easy Serving Ideas
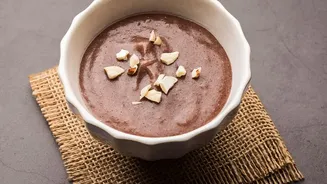
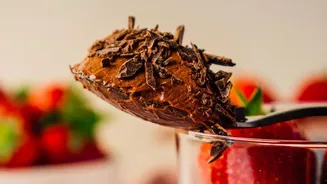
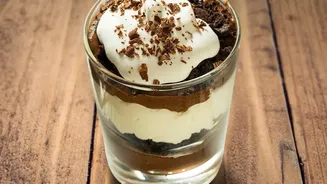
Serving your make-ahead pudding in individual glasses, ramekins, or small bowls instantly elevates the presentation. When you are ready to serve, simply remove the plastic wrap and garnish. A dollop of freshly whipped cream is a classic choice that provides a light, airy contrast to the rich pudding. For added texture and flavour, consider a sprinkle of chocolate shavings, a dusting of cocoa powder, or a few fresh raspberries. For a more sophisticated touch, a sprinkle of flaky sea salt can enhance the chocolate notes, or a scattering of crushed nuts like pistachios or hazelnuts can add a delightful crunch. These simple additions take only seconds but make the dessert feel special and thoughtfully prepared.