





Why Rings Demand So Much Stability
Unlike dips on parallel bars, gymnastic rings are not fixed in place. This inherent instability forces your body to work much harder. Your shoulders, chest, arms, and core must fire constantly to prevent the rings from moving away from you. This recruits
a greater number of stabilizer muscles, which are often underdeveloped, making the exercise feel shaky and difficult even for those with significant pressing strength. Mastering this instability is what makes the ring dip such a powerful tool for building functional strength and joint health.
Start with a Solid Foundation
Before you even touch the rings, ensure you have a baseline of pushing strength. You should be able to comfortably perform multiple sets of push-ups and standard bar dips. Experts often recommend being able to complete at least 15 parallel bar dips and 10-15 chest-to-floor push-ups before attempting ring variations. This foundational strength ensures your primary movers—the chest, triceps, and deltoids—are prepared for the load, allowing you to focus on the new challenge of stabilization.
Master the Ring Support Hold
The first and most critical step on the rings is the support hold. This is simply holding your body up with locked arms. Jump or step up so your arms are straight, and focus on keeping the rings close to your body. Your goal is to fight the shaking. A key technique is to externally rotate your hands so your palms face forward, which creates a more stable and safe shoulder position. Start with short, clean holds of 10-15 seconds, accumulating time across several sets. Only increase the duration once you can hold the position with minimal shaking. This static hold is the non-negotiable prerequisite for all other ring movements.
Introduce Negative Dips
Once your support hold is steady, you can begin to introduce movement with eccentric or 'negative' ring dips. Start in the top support position and lower yourself as slowly and controllably as possible. Aim for a descent of three to five seconds. At the bottom, place your feet on the ground and step back up to the top; do not push yourself back up yet. This eccentric phase builds strength through the exact range of motion you will use for a full dip, teaching your muscles to control the instability under tension. It is a highly effective way to build strength and prepare the connective tissues for the full movement.
Use Assistance to Go Full Range
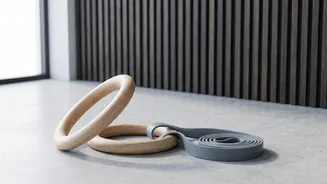
Assisted ring dips allow you to practice the full movement before you have the strength to do it with your full bodyweight. One popular method is using resistance bands; you can sling a band over both rings and place your knees or feet in it to provide upward support. Another effective method is the toe-supported dip, where you keep your toes on the floor in front of you, taking just enough weight off to allow you to complete the reps with good form. This helps you build motor control and address weak points in the movement pattern safely.
Avoid Common Form Mistakes
As you progress, be mindful of common errors that can lead to injury or hinder progress. A frequent mistake is shrugging the shoulders up towards the ears; instead, focus on keeping them depressed, or pushed down. Another is not going low enough; aim for your shoulders to go below your elbows at the bottom of the dip for a full range of motion. Finally, avoid moving too fast. Control, especially during the descent, is key to building the stability you need.