




Finding the Perfect Portal
The soul of this project is the door itself. The ideal candidate is a solid wood door, which offers the sturdiness needed to hold shelves and treasures. Look for doors with interesting features like recessed panels, which can serve as natural frames for your
shelves, or a weathered patina that tells a story. You can often find these gems at architectural salvage yards, flea markets, or a local Habitat for Humanity ReStore. Before you buy, give it a good inspection. Minor dents and chipped paint can add character, but avoid doors with significant rot, warping, or structural damage that could compromise the final piece. If you find a door with old paint, it's wise to test for lead, especially in older finds, and take appropriate safety precautions.
From Door to Display: The Build
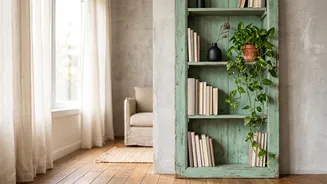
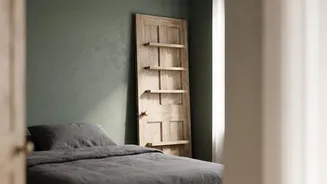
There are several ways to approach the construction, depending on your desired look and skill level. One popular method for a corner shelf involves cutting the door in half lengthwise. The two halves are then joined at a 90-degree angle to fit snugly into a corner. You can then add triangular or rectangular shelves cut from plywood or other lumber, attaching them with L-brackets for support. Another approach is to keep the door whole and cut out the inner panels with a jigsaw or skill saw. The removed panels can then be repurposed as the shelves themselves, installed on the back side to create a unit that leans against the wall like a ladder. This creates a rustic, farmhouse look with minimal extra materials.
Preparation and Personalisation
Once your design is decided, preparation is key. A thorough cleaning is the first step. If you plan to paint, a light sanding will help the new coat adhere properly. If you love the existing chippy, aged look, you might choose to simply seal it with a clear wax or polyurethane to preserve its character and prevent further flaking. For a fresh look, a coat of primer followed by a quality furniture paint will do wonders. Chalk paint is a popular choice for upcycling projects because it adheres well with minimal prep and offers a matte, vintage finish. Mineral or enamel paints provide a more durable, hard-wearing surface, ideal for a piece that will see a lot of use. Don't be afraid to choose a bold colour to make your shelf a true statement piece.
The Crucial Final Step: Safety
Any tall, narrow piece of furniture poses a tipping risk, especially in homes with children or pets. Securing your new shelf to the wall is a non-negotiable final step for safety. The most effective method is to use furniture straps or L-brackets to anchor the unit to wall studs. Use a stud finder to locate the studs behind your wall for the most secure attachment point. Typically, two anchors placed near the top of the shelf are sufficient, ensuring the straps are pulled tight with no slack. This simple action takes only a few minutes but provides essential peace of mind, ensuring your beautiful creation is as safe as it is stylish.
Styling Your Upcycled Masterpiece
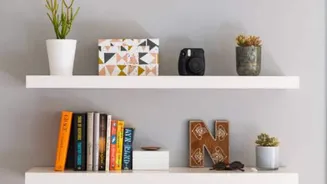
With the shelf built and safely installed, the fun part begins: styling. The vertical design is perfect for drawing the eye upward, making a small room feel taller. Arrange a mix of items on the shelves. Books, small potted plants, framed photos, and cherished trinkets will bring the piece to life. Play with height and texture, clustering items in small groups and leaving some empty space to avoid a cluttered look. Let the door's original features, like an old keyhole or a beautiful doorknob, remain visible as part of the display. This isn't just a shelf; it's a conversation starter and a testament to the beauty of repurposed decor.