


Why Origami Is Perfect For Small Spaces
Before you start folding, it's worth appreciating why this craft is an ideal choice for compact rooms. Unlike bulky canvases or heavy frames, origami art is virtually weightless. This makes it easy to hang and rearrange without damaging your walls. The
3D nature of folded paper adds texture and depth, creating subtle shadows that can make a wall feel more dynamic. Moreover, the minimalist aesthetic of many origami designs aligns perfectly with the 'less is more' principle often used to make small areas feel more spacious and open. You can create a significant visual impact with just paper, making it a budget-friendly and deeply personal decor project.
Choosing Your Paper and Palette
The foundation of your art is the paper itself. While you can use anything from printer paper to old book pages, traditional origami paper is recommended because it's thin, crisp, and holds a fold well. For a small room, your colour choice is crucial. Light and cool colours like soft blues, greys, and pastels can make a space feel larger. Consider an ombré effect with different shades of a single colour, or a cohesive palette that matches your existing decor. You can buy pre-cut squares or cut larger sheets of decorative paper, gift wrap, or scrapbook paper to your desired size. Using various sizes will create a sense of depth in your final arrangement.
Simple Patterns With Big Impact
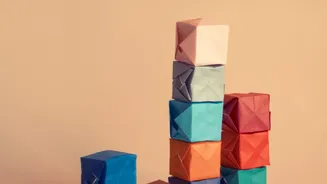
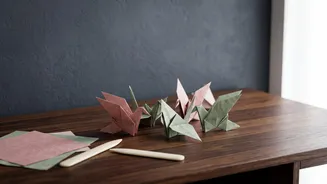
You don't need to be an origami master to create stunning wall art. Some of the most effective designs are based on simple, repeating patterns. The origami crane is perhaps the most famous and symbolic model, representing hope and longevity. Butterflies are another popular choice, bringing a sense of lightness and movement to a wall. For a more modern, geometric look, consider folding simple pyramids, sonobe units, or hexagons. These modular pieces can be interlocked to create larger, intricate patterns. The key is to choose one or two patterns and create multiple units, allowing the repetition and arrangement to be the focus.
The Art of the Fold
Once you've chosen your pattern, it's time to fold. The secret to beautiful origami is precision. Work on a flat, hard surface. Make each fold as crisp and exact as possible; a bone folder can help create sharp creases, but a fingernail works too. Take your time and enjoy the mindful process. If you're making modular units, like those for a 3D pyramid or hexagon display, consistency is key. Even slight variations in folding can become noticeable when you assemble the final piece. Don't be discouraged if your first few attempts aren't perfect. Like any craft, it takes a little practice to get the feel for it.
Designing Your Layout
Before you attach anything to the wall, plan your composition. You can lay your folded pieces on the floor or a large table to experiment. For a small wall, a curated group of three to five larger pieces often works better than a scattering of many tiny ones. Consider a vertical arrangement to draw the eye upward and create an illusion of height. You could create a cascading flow of butterflies, a tight geometric grid of pyramids, or a freeform, organic cluster. A great trick is to create paper templates of your shapes and tape them to the wall with painter's tape to finalise your layout without any commitment.
Mounting Your Art Without Damage
The beauty of lightweight paper art is that you don't need nails. For a completely damage-free approach, adhesive tack or washi tape are excellent choices. For a more secure but still temporary hold, small glue dots or double-sided tape work well. Another method involves creating your design on a piece of foam board or cardboard, which you can then hang from a single hook. This allows you to create a contained piece of art and easily move it. For 3D pieces, a tiny dab of craft glue can help hold the final shape before mounting. Whichever method you choose, ensure the wall surface is clean and dry before you begin.