






A Gentle Start to Building Strength
The primary advantage of a wall push-up is that it significantly reduces the amount of body weight you have to lift, making it much easier than a standard push-up. When you perform a push-up against a wall, you're only lifting a small percentage of your
body weight, which places less stress on your joints, particularly your wrists and shoulders. This makes it an excellent choice for absolute beginners, older adults, or individuals recovering from injury. It allows you to focus on the movement pattern and build a base level of strength without feeling overwhelmed or risking injury. The exercise helps develop functional strength that you use in everyday activities, like pushing open a heavy door or getting up from a chair.
Mastering Form and Muscle Engagement
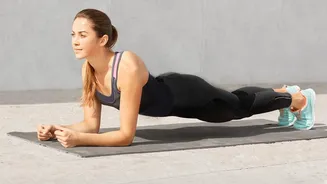
Because wall push-ups are less demanding, they allow you to concentrate on perfecting your form—a crucial element for preventing injury and ensuring the exercise is effective. This variation works many of the same muscles as a traditional push-up, including the chest (pectorals), shoulders (deltoids), and the back of your arms (triceps). It also engages your core muscles, like the rectus abdominis and obliques, which are essential for keeping your body stable and straight during the movement. Learning to keep your body in a straight line from head to heels, without letting your hips sag or rise, teaches you the proper 'plank' position that is foundational to more advanced exercises.
How to Perform a Wall Push-Up Correctly
Proper technique is key to getting the most out of your wall push-ups. Start by standing about an arm's length away from a sturdy wall, with your feet shoulder-width apart. Place your palms flat on the wall at about chest or shoulder height, slightly wider than your shoulders, with your fingers pointing toward the ceiling. Before you begin, engage your core to create a straight line with your body. Slowly bend your elbows, keeping them at about a 45-degree angle to your body rather than flaring them straight out to the sides, and lean your chest toward the wall. Go as far as you can without letting your form break, ideally until your nose is close to the wall. Exhale and push back firmly to the starting position, ensuring your arms are fully extended but not locked.
Common Mistakes to Avoid
Even with a simpler exercise, poor form can lead to problems. One of the most common mistakes is flaring the elbows out too wide, forming a 'T' shape with the body, which can put unnecessary strain on the shoulder joints. Another frequent error is poor body alignment; either letting the hips sag toward the wall or sticking them out behind you breaks the straight line you should be maintaining. Also, be mindful of your head position. Avoid the urge to 'poke' your chin forward to touch the wall first; your head should remain in a neutral position, aligned with your spine throughout the movement. Focusing on controlled movements rather than speed will ensure you're using your muscles correctly and not just momentum.
Progressing Beyond the Wall
Once you can comfortably perform several sets of wall push-ups with perfect form, you're ready to increase the challenge. The goal is to gradually decrease the angle of your body to lift more of your weight. You can start by simply taking a step further back from the wall. The next logical step is to move to an incline push-up, using a sturdy surface like a kitchen counter, a bench, or a stable chair. As you get stronger, you can progressively lower the height of the incline—moving from the counter to a bench, and then to a low step—until you are finally strong enough to attempt a push-up on your knees or even a full push-up on the floor. This gradual progression builds strength safely and sets you up for long-term success.