






The Joy of a Never-Ending Garden
Plant propagation is a rewarding skill for any home gardener. It’s not just about saving money; it’s about creating an abundance of life from a single source. Imagine turning a beloved money plant into several new ones to place in different rooms or gift
to friends and family. This process allows you to clone your favourite plants, ensuring you always have a backup, and to share the joy of gardening with your community. Many gardeners in India find the monsoon season to be the perfect time for propagation, as the high humidity naturally encourages roots to grow. By learning a few basic techniques, you can ensure your home is always brimming with vibrant, healthy plants.
The Simplest Method: Water Propagation
While there are many ways to propagate plants, the most popular and beginner-friendly method is rooting cuttings in water. This technique is incredibly straightforward and visually rewarding, as you can watch the new roots emerge and grow day by day. It's a clean, simple process that doesn't require special soil mixes or equipment to get started. Many common houseplants found in Indian homes, from pothos to philodendrons, take to water propagation with ease, making it a nearly foolproof way to expand your collection. It's the perfect starting point for anyone new to the world of making 'plant babies'.
Step 1: Choose Your Plant and Make the Cut
The first step is to select a healthy, mature plant. Look for vigorous stems with plenty of leaves. Plants like Golden Pothos (Money Plant), Syngonium (Arrowhead Plant), Spider Plants, and many Philodendron varieties are excellent candidates that root quickly in water. Once you have your plant, you'll need a clean, sharp pair of scissors or shears. Identify a healthy stem and locate a 'node'—this is a small bump on the stem where a leaf grows from, and it's where new roots will sprout. Make a clean cut about a quarter-inch below the node. A good cutting should be around 4-6 inches long and have at least two or three leaves at the top.
Step 2: Prepare the Cutting and Add Water
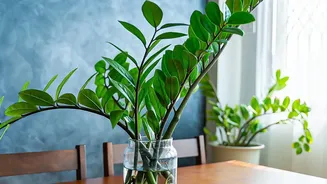
After you've made the cut, gently remove any leaves from the bottom half of the stem. This is crucial because any leaves left submerged in water will rot, potentially fouling the water and killing your cutting. You should only have leaves at the very top of the stem, well above the water line. Next, place your prepared cutting in a clean glass jar or bottle filled with room-temperature water. Using a clear container allows you to easily monitor root growth. Ensure the nodes on the lower part of the stem are fully submerged, but keep the leaves out of the water.
Step 3: Be Patient and Provide Light
Now comes the easiest, yet sometimes hardest, part: waiting. Place the jar in a spot that receives plenty of bright, indirect sunlight, like a windowsill that doesn't get harsh afternoon sun. Direct sunlight can be too intense and may scorch the cutting. The key to success is maintaining fresh water. Change the water every few days, or at least once a week, to replenish oxygen and prevent bacteria from forming. Within a few weeks, you should start to see small, white roots emerging from the nodes. It's a magical moment and a sure sign that your propagation is a success.
Step 4: Transplanting to Soil
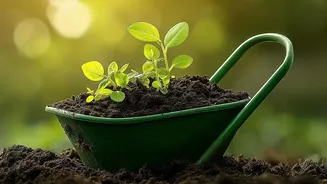
Once the new roots are about one to two inches long, your cutting is ready to be transferred to soil. Don't wait too long, as roots that become too accustomed to water can have a harder time adapting to soil. Prepare a small pot with a well-draining potting mix. A mix of cocopeat, soil, and perlite or sand works well for most houseplants. Make a hole in the centre of the soil, gently place the rooted cutting inside, and carefully fill the soil around it. Water it thoroughly and keep the soil consistently moist for the first few weeks as the new plant establishes itself. Before you know it, you'll see new leaf growth, confirming your new plant is thriving in its home.