




The Science of Shiny Hair
The secret to shiny hair lies in its structure. Each hair strand is covered by an outer layer called the cuticle, which is made of tiny, overlapping scales. When these scales lie flat and smooth, they create a uniform surface that reflects light, resulting
in a glossy appearance. However, factors like heat styling, chemical treatments, and even harsh brushing can cause these scales to lift and become rough. A rough cuticle scatters light instead of reflecting it, making hair appear dull and frizzy. The goal of any shine treatment is to smooth and seal this cuticle layer, and a DIY mask can achieve this temporarily and effectively.
Your Key Shine-Boosting Ingredients
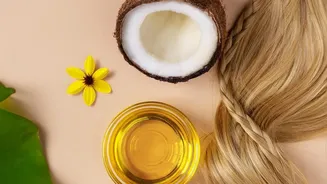
A simple yet powerful mask can be created using just a few kitchen staples, each playing a specific role in promoting shine. The core ingredients are often an acidic element, a humectant, and a nourishing oil. Apple Cider Vinegar (ACV) is a star performer due to its acidic nature. It helps to lower the hair's pH, which in turn helps to flatten and close the cuticle. Honey is a natural humectant, meaning it attracts and retains moisture, which is essential for healthy, flexible hair. Finally, an oil like coconut or argan oil helps to moisturize, reduce breakage, and coat the hair shaft, sealing in the smoothness.
A Simple Recipe for Luminous Shine
Creating your shine mask is straightforward. You will need: - 1 tablespoon of raw, unfiltered apple cider vinegar - 1 tablespoon of raw honey - 1 tablespoon of melted coconut oil or argan oil - 1 whole egg (optional, for a protein boost) In a small bowl, start by whisking the honey and apple cider vinegar together until they are well combined. Add the melted coconut oil and continue to mix. If you are using an egg for its strengthening protein properties, whisk it in last until the mixture is smooth and has a consistent texture. Ensure there are no lumps, as this will make the application easier and more even. The resulting mask should be creamy but still liquid enough to spread through your hair.
How to Apply for Maximum Gloss
For the best results, apply the mask to dry or slightly damp hair. Start by sectioning your hair to ensure even coverage. Using your fingers or a brush, work the mixture from the roots to the tips, paying special attention to the mid-lengths and ends where hair is often the most damaged and dull. Once your hair is fully saturated, gently pile it on top of your head and cover it with a shower cap or plastic wrap. This traps heat from your scalp, which helps the ingredients penetrate more effectively. Let the mask sit for 20-30 minutes. Afterward, rinse your hair thoroughly with lukewarm water before proceeding with your usual shampoo and conditioning routine. A final rinse with cool water can provide an extra shine boost by helping to seal the cuticle even further.
Why the Shine Is Temporary (and Safe)
The key benefit of this DIY mask is that it enhances shine without permanently altering your hair's internal structure. Salon treatments like chemical relaxers or permanent dyes work by breaking the disulfide bonds within the hair shaft to change its texture or color permanently. This mask, however, works entirely on the surface. The acidic vinegar and conditioning ingredients simply coat the hair and smooth down the cuticle scales. The effect is similar to a salon gloss treatment, which also provides a temporary, semi-permanent coating. Because no chemical bonds are broken, the results will gradually fade over a few washes, leaving your hair's natural structure completely intact and undamaged. This makes it a safe and gentle way to boost shine whenever your hair needs it.