



The Allure of Architectural Salvage
Moving beyond the expected is the hallmark of great interior design. Architectural salvage—the practice of rescuing and reusing items from old buildings—offers a direct path to a home filled with character. Vintage door hardware, such as glass knobs,
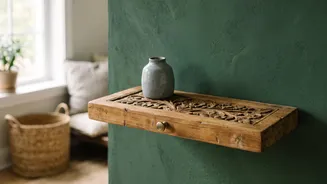
ornate brass backplates, cast iron hinges, or even mail slots, provides texture and a sense of history that new items simply can't replicate. Each piece has a past, whether it came from a Victorian home, a classic schoolhouse, or a rustic farmhouse. Incorporating these elements into a simple shelf not only saves a beautiful object from the landfill but also infuses your space with a unique narrative and charm.
Sourcing Your Vintage Treasures
Finding the perfect vintage details is part of the fun. Start by exploring local architectural salvage yards, flea markets, and antique stores. These places are often treasure troves of hardware from various eras and styles. Look for items with interesting shapes and patinas—a weathered brass doorknob, a keyhole cover with intricate details, or a small, panelled section of a door. Don't be afraid of a little rust or tarnish; that's part of the character. Online marketplaces are also a great resource. When handling older painted items, it's wise to consider the possibility of lead paint, especially on pieces made before 1978. Simple, inexpensive lead test kits are available at hardware stores and can give you results in minutes. If lead is detected, take appropriate safety precautions or choose a different piece.
Designing Your One-of-a-Kind Shelf
There are endless ways to incorporate your vintage finds. The simplest approach is to build a basic floating or bracketed shelf and use the hardware as decoration. A set of elegant glass doorknobs can be mounted beneath the shelf to serve as unique hooks for bags or scarves. An ornate mail slot or a beautiful backplate can be centred on the shelf's front edge for a purely aesthetic touch. For a more ambitious project, a solid wood panel from an old door can be cut down to become the shelf itself. This approach showcases the door's original craftsmanship, from its bevelled edges to its recessed details. Plan your design around the pieces you find, letting their unique qualities guide the final look.
Building the Foundation
For a basic shelf, you'll need a solid wood board (pine is a great, affordable option), shelf brackets, a drill, screws, and a level. Begin by preparing your wood. Sand it smooth, then decide on a finish. You can stain it to highlight the grain, paint it a solid colour, or use a distressing technique to give it a weathered look that complements your vintage hardware. Once the board is ready, carefully measure and attach your chosen door details. Pre-drill small pilot holes for any screws to avoid splitting the wood. Next, attach the shelf brackets to the board, ensuring they are square and evenly spaced for maximum support.
The Critical Final Step: Secure Wall Anchoring
A beautiful shelf is useless if it isn't securely attached to the wall. This step is non-negotiable, especially when dealing with solid wood and heavy vintage hardware. The most secure method is to screw the brackets directly into wall studs. Use a stud finder to locate them. If studs aren't available where you want to place your shelf, you must use appropriate wall anchors. Do not rely on simply driving a screw into drywall; it will not hold. For medium-to-heavy shelves, toggle bolts or molly bolts are excellent choices for hollow drywall or plaster walls. These anchors expand behind the wall, creating a strong grip capable of supporting significant weight. Always check the weight rating on the anchor packaging and use a level to ensure your shelf is perfectly horizontal before drilling the final holes.