






The Truth About Resting Poori Dough
Unlike many other breads that require a long resting period for gluten to develop and yeast to activate, poori dough is fundamentally different. Made with unleavened whole wheat flour (atta), its magic doesn't come from fermentation. In fact, resting the dough for too
long is counterproductive. A prolonged rest can cause the dough to become too soft, leading to pooris that absorb excess oil and don't puff properly. The ideal resting time is just 10 to 20 minutes. This short period is enough to let the flour hydrate evenly, making the dough smooth and easy to roll without compromising its structure.
Crafting the Perfect Dough Consistency
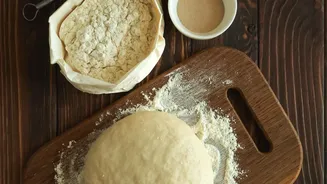
The single most important factor for a successful poori is a firm, stiff dough. It should be noticeably firmer than the dough you would make for chapatis or rotis. A soft dough is the main culprit behind oily, flat pooris. When kneading, add water gradually until the flour just comes together into a tight ball. It should feel stiff but not dry or crumbly. After bringing it together, kneading for a few minutes with a touch of oil will give it a smooth finish. A good test is to press a finger into the dough; the indentation should remain without springing back completely. Some recipes also suggest adding a small amount of fine semolina (sooji/rava) for extra crispness.
The Science of the Puff
That magical moment when a flat disc of dough inflates into a golden orb is pure kitchen science. It’s not air inside the poori, but steam. When the poori hits the hot oil, the moisture within the dough rapidly turns into steam. This steam gets trapped between the quickly-cooked outer layers, forcing the poori to expand and puff up. For this to happen, three conditions are crucial: the dough must be stiff enough to trap the steam, the poori must be rolled to an even thickness, and the oil must be very hot. If rolled too thin, it won't have enough dough to puff; if too thick, it may not cook through.
Mastering the Roll and Fry
To ensure clean oil and perfect pooris, avoid using dry flour for rolling, as it can burn and leave a bitter taste. Instead, apply a little oil to your dough balls and rolling surface. Roll the pooris to a uniform thickness of about 1-2 millimetres. The temperature of the frying oil is critical. To test it, drop a tiny piece of dough into the kadai; it should sizzle and rise to the surface immediately. Slide the poori into the hot oil and gently press it down with a slotted spoon. This gentle pressure encourages it to puff up completely. Once it puffs, flip it over and fry for a few more seconds until golden brown on both sides. The entire process for one poori should take less than 30 seconds.
Common Mistakes to Avoid
Even experienced cooks can face poori problems. Here are the most common pitfalls and how to avoid them: 1. Dough is too soft: This is the number one reason for oily and flat pooris. Always aim for a firm, tight dough. 2. Over-resting the dough: Resting for more than 20-30 minutes makes the dough soft and prone to absorbing oil. 3. Oil isn't hot enough: Cold oil leads to greasy, unpuffed pooris. Ensure it's hot enough before you start frying. 4. Rolling too thin: Paper-thin pooris are likely to turn out like crisp papads rather than soft, puffed bread. 5. Using dry flour for dusting: It burns in the hot oil, making the oil dirty and giving the pooris a slightly burnt flavour.