






Why This Hairstyle Works
The low bun is a timeless classic for a reason. It is incredibly versatile, capable of being styled as a sleek, professional updo or a soft, romantic look with face-framing tendrils. The twisted detail adds a touch of sophistication that looks far more
complex than it is to create, making it a go-to for women who want a polished look without spending hours in front of the mirror. It’s suitable for most hair lengths and types, and it keeps your hair neatly off your neck, which is perfect for any season or occasion.
Gather Your Essential Tools
Before you begin, having the right tools on hand makes the process smooth and simple. You don't need a professional kit, just a few key items. Make sure you have: a hairbrush or comb to detangle, hair elastics, and the star of the show—hair pins. U-shaped pins or spiral 'spin pins' are often recommended for securing buns as they can hold more hair with less fuss than traditional bobby pins. A light-hold hairspray or a texturizing spray can also be helpful for grip and longevity.
Step 1: Prepare Your Hair
For the best results, start with dry hair that is free of tangles. Many stylists suggest that this style holds better on second-day hair, as the natural oils provide more grip. If your hair is freshly washed and feels too silky, a light mist of dry shampoo or texturizing spray at the roots will add the volume and texture needed to help the bun stay in place. Brush your hair back and gather it at the nape of your neck as if you are about to make a low ponytail.
Step 2: Create the Low Ponytail Base
Secure your hair into a low ponytail at the nape of your neck with a hair elastic. The placement is key: a lower ponytail creates a more classic, elegant look. For a sleeker foundation, ensure the hair is smooth and without bumps before tightening the elastic. If you prefer a softer, more voluminous look, you can gently tug on the hair at the crown to create some lift before moving on.
Step 3: Twist and Wrap the Bun
Now for the defining twist. There are a couple of popular methods. The simplest is to take the entire ponytail and twist it tightly from the base to the ends. Then, wrap the twisted hair around the elastic to form a coiled bun. Another popular technique involves splitting the ponytail into two equal sections. Twist each section individually, then wrap them around the base of the ponytail in opposite directions. This two-section method often creates a fuller, more textured-looking bun. Tuck the ends of your hair underneath the bun.
Step 4: Secure with Hair Pins
This is where hair pins work their magic. Unlike bobby pins that clamp small sections, U-shaped pins and spin pins are designed to anchor the bun to the hair on your head. For U-pins, slide the pin into the outer edge of the bun, catch some of the hair from your scalp at the base, and push it back into the bun. For an extra-secure hold, try inserting pins from different directions—north, south, east, and west. If you're using spiral spin pins, you typically only need two. Simply screw one pin into the top of the bun and another from the bottom until they feel secure. These pins are known for providing an all-day hold without the need for a dozen bobby pins.
Customize Your Look
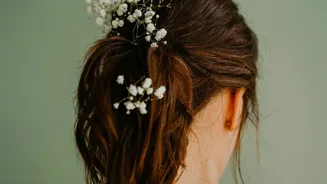
Once your bun is secure, you can personalize it. For a messier, more undone vibe, gently pull on the edges of the bun to fan it out and increase its size. You can also pull out a few face-framing strands to soften the overall look. For a sleek, polished finish, use a light-hold hairspray to tame any flyaways. Don't be afraid to add accessories like decorative clips, a silk scarf, or floral pins to elevate the style for a special occasion.