


Understanding the Danger to Your Camera
Pointing a camera directly at the sun is like using a magnifying glass to focus light onto a single point. Your lens concentrates the sun's intense light and radiation onto the delicate image sensor. Within seconds, this focused energy can heat up and physically
melt or fry the sensor's pixels, shutter curtains, and other internal parts. The damage is often permanent, resulting in dead pixels, discoloured spots, or a completely failed sensor. Even pointing the camera at the sun for a brief moment can be risky, especially with telephoto lenses that magnify the effect. This is why standard lens hoods or regular filters are not enough; you need specialized equipment to photograph the sun safely.
The Most Critical Tool: A Certified Solar Filter
The only non-negotiable piece of equipment for photographing an eclipse is a certified solar filter. Do not confuse this with a standard Neutral Density (ND) filter. While very dark ND filters (15-stops or more) can be used with mirrorless cameras where you only use the rear screen, a proper solar filter is the safest bet for all camera types. Look for filters that are specifically designed for solar photography and meet the ISO 12312-2 international safety standard. These filters are designed to block more than 99.999% of the sun's intense light, as well as harmful ultraviolet (UV) and infrared (IR) radiation, making it safe for your camera.
Proper Filter Placement and Use
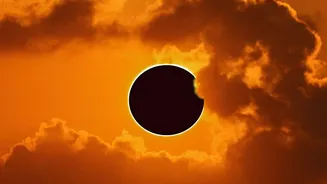
A solar filter must always be placed on the front of your lens, covering the entire opening. This ensures the intense light and heat are blocked before they enter the lens and get magnified. Never place a filter between the lens and the camera body. Ensure the filter is securely attached so it cannot accidentally fall off while you are shooting. During the partial phases of the eclipse, the filter must remain on at all times. The only time it is safe to remove the filter is during the brief moments of totality, when the moon completely obscures the sun. Be ready to put it back on the instant the sun begins to reappear.
Safe Focusing and Composing
Never look through your camera's optical viewfinder (OVF) when it is pointed at the sun, even with a solar filter attached, as it is not guaranteed to protect your eyes. The safest way to compose your shot is by using your camera's 'Live View' mode, which displays the image on the rear LCD screen. This allows you to see what the camera's sensor sees without looking directly through the lens. Using Live View also helps you achieve sharp focus, which can be tricky. Use your camera's zoom function in Live View to magnify the edge of the sun and manually adjust the focus until it is tack-sharp. Once focused, you can tape the focus ring down to prevent it from shifting.
Camera Settings for a Perfect Shot
There are no universal settings for an eclipse, so testing beforehand is key. Put your camera in Manual (M) mode to have full control. Start with the lowest native ISO your camera offers (like ISO 100) to ensure the cleanest image. Choose a mid-range aperture like f/8 or f/11 for good sharpness. Your shutter speed will be the main variable you adjust. With your solar filter on, take test shots of the full sun on a clear day to find a shutter speed that exposes the sun correctly without blowing out the highlights. A good starting point might be around 1/250s, but this will vary based on your filter's density. Using your camera's histogram can help you nail the exposure.
Don't Forget Your Own Safety
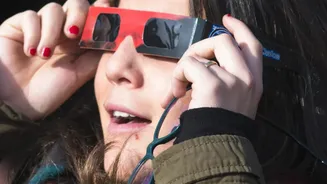
Protecting your camera is important, but protecting your eyes is paramount. Never look directly at a partial solar eclipse without proper eye protection. The same rules apply to your eyes as they do to your camera. You need to use certified solar eclipse glasses or viewers that also meet the ISO 12312-2 standard. Regular sunglasses, no matter how dark, are not safe for looking at the sun. When you are not looking through your camera's filtered lens, be sure to wear your eclipse glasses to enjoy the view safely.