






Step 1: Choose a Healthy Parent Plant
Your new plant's success begins with its parent. Choose a mature, healthy, and robust plant that is actively growing and free from any pests or diseases. Look for strong stems with plenty of leaves. Many common Indian household plants are perfect for this,
including money plants (Pothos), Syngonium, Tradescantia, hibiscus, and even succulents like the Jade Plant. The best time to take cuttings is usually during a plant's growing season, which for many is in the spring and summer, as this is when they have the most energy for creating new roots.
Step 2: Make the Right Cut
Using a clean, sharp pair of scissors or a knife is crucial to avoid crushing the stem or introducing disease. Identify a healthy stem and look for a node—a small bump on the stem where a leaf grows from. This area is rich with cells that can generate new roots. Make a clean cut about 4 to 6 inches long, just below a node. Some gardeners prefer cutting at a 45-degree angle to increase the surface area for root development. Make sure the cutting has at least two to three leaves at the top.
Step 3: Prepare the Cutting
Once you have your cutting, you need to prepare it for rooting. Gently remove the lower leaves, ensuring that at least two or three leaves remain at the very top. Any leaves left below the surface of the water or soil will rot, which can spoil the entire effort. You should also remove any flowers or flower buds. This might seem counterintuitive, but it directs the cutting's energy towards producing roots instead of seeds.
Step 4: Choose Your Rooting Method
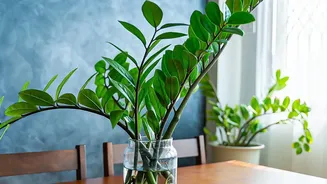
You have two primary options for rooting: water or soil. For beginners, water is often the easiest as you can watch the roots grow. Simply place the cutting in a jar of clean water, ensuring at least one node is submerged. Change the water every few days to keep it fresh. Alternatively, you can plant the cutting directly into a rooting medium. A good rooting mix should be light and well-draining to prevent rot. You can use a mix of peat moss and perlite, or even just sand or vermiculite. A sterile medium is preferred to prevent infections that can hinder root growth.
Step 5: Plant and Encourage Rooting
If rooting in soil, fill a small pot with your chosen moist medium. Using a pencil or your finger, make a hole in the centre. Before planting, you can dip the cut end into a rooting hormone powder. While not always necessary, especially for easy-to-root plants like Pothos, it can speed up the process and increase your success rate. Gently place the cutting into the hole and firm the soil around it to remove air pockets.
Step 6: Create a Humid Environment
Cuttings lose moisture through their leaves, but they don't yet have roots to absorb water. To solve this, you need to create a humid environment. You can cover the pot with a clear plastic bag to trap moisture, creating a mini-greenhouse. Use small sticks to ensure the bag doesn't touch the leaves. Place the pot in a location with bright, indirect light. Direct sunlight can be too intense and scorch the fragile cutting. If you're rooting in water, this step isn't as critical, but keeping the cutting away from direct sun is still important.
Step 7: Be Patient and Provide Aftercare
Rooting can take anywhere from a few weeks to a couple of months, depending on the plant and conditions. During this time, ensure the soil stays consistently moist but not waterlogged. Avoid the temptation to fertilize, as this can burn the new, delicate roots. Once you see new leaf growth, it's a good sign that roots have formed. For soil cuttings, a gentle tug can also confirm resistance, indicating root development. If you rooted in water, transplant the cutting to soil once the roots are about an inch long.