






Why Multiply Your Plants?
Plant propagation is essentially creating new plants from an existing 'parent' plant. Instead of buying new ones, you can clone your collection using parts like stems or leaves. The benefits are numerous: it's incredibly cost-effective, reduces waste,
and deepens your connection to your plants. Pruning is often necessary for a plant's health, and propagation turns those trimmed pieces into new life rather than compost. There’s a unique satisfaction in watching a small cutting sprout roots and grow into a full, independent plant, a process that can feel like a small miracle happening on your windowsill.
The Golden Rule: Find the Node
The most common reason beginner propagation attempts fail is simple: the cutting was taken from the wrong spot. To successfully grow a new plant from a stem cutting, you must include at least one 'node'. A node is a small bump or joint on the stem where leaves, branches, and, most importantly, new roots emerge. Simply snipping off a leaf with its stalk won't work for most common houseplants like Pothos or Philodendrons. Before you make a cut, examine the stem and locate these vital growth points. Your cutting should be a piece of stem, ideally 3-5 inches long, that includes a node.
Method 1: The Water Technique
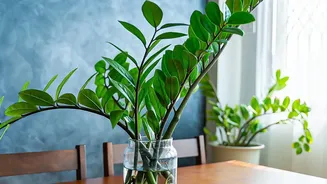
Water propagation is the easiest and most visually satisfying method for beginners. Many common houseplants, like Pothos, Spider Plants, and some Philodendrons, root readily in water. First, sterilise your scissors or pruning shears with rubbing alcohol to prevent introducing bacteria. Take your cutting, ensuring it has a node, and remove any leaves that would be submerged in water, as they will rot. Place the cutting in a clean glass or jar filled with fresh water, making sure only the stem and node are underwater, not the remaining leaves. Place the jar in a spot with bright, indirect light—too much direct sun can scorch the fragile cutting. Then, be patient. Change the water every few days and within a few weeks, you should see small, white roots begin to emerge from the node.
Method 2: Straight to Soil
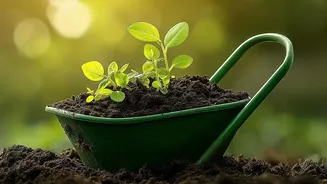
Another option is to plant your cutting directly into soil. This method works well for many of the same plants and avoids the potential shock cuttings can experience when moving from water to soil. After taking your cutting, you can dip the cut end into a rooting hormone powder. While not always necessary, this powder can speed up the process and increase success rates. Plant the cutting in a small pot with a fresh, well-draining potting mix. The key is to keep the soil consistently moist but not waterlogged, as too much water can cause the stem to rot before it can grow roots. Placing a clear plastic bag over the pot can help create a humid environment, which encourages rooting.
Common Pitfalls to Avoid
Success in propagation often comes from avoiding a few common mistakes. Always use clean tools and containers to prevent disease. Don't take cuttings from unhealthy or stressed plants; start with a vigorous and healthy parent. Be patient, as some plants can take several weeks or even months to show signs of rooting. Checking on them too often by pulling them out of the soil can disturb the delicate new roots. Finally, once your water-propagated cutting has developed a solid root system (about an inch or two long), it’s time to pot it in soil. Don't leave it in the water for too long, as it may struggle to adapt to a soil environment later.