




The Foundation: A Soft and Pliable Dough
The journey to a crisp paratha begins with the dough. For stuffed parathas, your dough must be soft and pliable, more so than for a regular roti. A stiff dough is difficult to roll and prone to cracking, which allows the filling to escape. Use warm water
to knead the atta (whole wheat flour), adding it gradually. Incorporating a tablespoon of oil or ghee into the dough will make it more elastic. Knead for a good 10-15 minutes until it is smooth. Perhaps the most crucial step is to let the dough rest. Cover it with a damp cloth and set it aside for at least 20-30 minutes. This allows the gluten to relax, making the dough significantly easier to roll out evenly without tearing.
The Secret: A Perfectly Dry Filling
Moisture is the number one enemy of a crisp paratha. Cauliflower has a very high water content, which can turn your filling into a soggy mess and steam the paratha from the inside. To combat this, the preparation of your gobhi is critical. After grating the cauliflower, mix it with salt and let it sit for about 15 minutes. The salt will draw out a surprising amount of water. Next, you must squeeze out this excess moisture completely. You can do this by pressing the grated cauliflower in your hands or, for best results, wringing it out in a clean muslin cloth. Only after this step should you add your spices like ginger, green chillies, and garam masala. Adding the salt just before you are ready to stuff the parathas also prevents the mixture from releasing more water while it sits.
The Technique: Even Rolling, No Tearing
How you stuff and roll the paratha directly impacts the final cook. Don't overstuff it; a golf-ball-sized portion of dough can comfortably hold about a tablespoon of filling. After placing the filling, bring the edges of the dough together and pinch them to seal, removing any excess dough at the top to avoid a thick, doughy centre. Gently flatten the stuffed ball with your fingers to evenly distribute the filling before you even pick up the rolling pin. Dust the surface lightly with flour and roll with gentle, even pressure. Roll from the centre outwards, and rotate the paratha frequently to ensure a uniform thickness. If you apply too much force, the dough will tear. A well-rolled paratha, where the filling is evenly spread, will cook uniformly without raw spots.
The Final Act: Mastering the Tava Heat
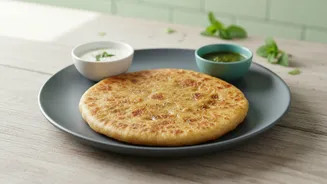
This is where crispiness is born or lost. The key is to cook on a medium to medium-high heat. A flame that's too high will scorch the outside of the paratha before the filling is cooked, leaving you with a burnt exterior and a raw interior. Conversely, a flame that's too low will dry the paratha out, making it hard instead of crisp. Heat your tava first. Place the rolled paratha on the hot, dry tava and cook for about a minute until you see small bubbles form. Flip it over and cook the other side for another minute. Now, apply ghee or oil. Flip again and press gently with a spatula, especially around the edges, to encourage it to puff up. The puffing action helps cook the inner layers and creates that desirable crisp texture. Flip a couple more times, applying a little more ghee, until both sides are golden brown and evenly cooked.