



It All Begins with the Dough
The foundation of a great paratha is a soft, pliable dough. If your dough is too stiff, you'll need to apply more pressure while rolling, which forces the filling to the edges and leaves the centre thick and doughy. For a soft and stretchy dough, use
lukewarm water and add a teaspoon of oil or ghee while kneading. Knead for at least 5-7 minutes until it's smooth and supple. After kneading, it's crucial to let the dough rest. Cover it with a damp cloth and set it aside for at least 20-30 minutes. This resting period allows the gluten to relax, making the dough more elastic and easier to roll without tearing.
Perfecting the Filling Consistency
The consistency of your filling is just as important as the dough. A wet or lumpy filling is a primary cause of tearing and uneven cooking. For potato-based fillings like aloo paratha, ensure the boiled potatoes are cooled completely before mashing. Grating the potatoes instead of mashing can also help achieve a more uniform, manageable texture. If your filling seems too moist, you can add a tablespoon of breadcrumbs, roasted besan (gram flour), or even sattu to absorb excess moisture. Crucially, the filling must be at room temperature before you start stuffing; a hot filling will steam the dough from the inside, making it weak and prone to breaking.
The Art of Sealing and Rolling
How you enclose the filling and roll the paratha determines the final distribution. Don't overstuff the dough ball; a golf ball-sized portion of dough can typically handle about a tablespoon of filling. When sealing, bring the edges of the dough together and pinch them at the top. It's a common mistake to just flatten this top knot of dough. Instead, pinch off the excess dough to avoid a thick, doughy centre. Before rolling, gently flatten the stuffed ball with your fingers to spread the filling evenly inside. When you start rolling with a pin, use light, even pressure. Roll from the centre outwards, and rotate the paratha frequently to ensure it spreads evenly without the filling being pushed to just the edges.
Mastering the Heat on the Tawa
The final step is the cooking, and temperature control is everything. The tawa or griddle should be heated on a medium to medium-high flame. If the tawa is not hot enough, the paratha will take too long to cook and become hard. If it's too hot, the outside will burn quickly while the inside, especially the thicker centre, remains raw. You'll know the tawa is ready when a drop of water sizzles and evaporates immediately. Place the rolled paratha on the hot, dry tawa. Don't add any oil or ghee just yet.
The Flip, Press, and Puff Technique
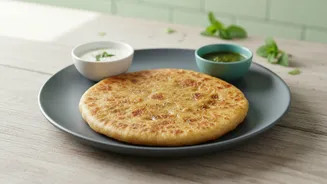
Cook the first side for about 30-40 seconds, or until you see small bubbles forming and the colour starts to change slightly. Flip it over. Now, you can apply ghee or oil to this semi-cooked top side. Let the second side cook for about a minute. Flip again and apply ghee to the other side. As it cooks, use a flat spatula to gently press down on the edges of the paratha. This encourages the trapped steam to move towards the centre, helping it puff up and cook evenly from the inside. Keep flipping every 30 seconds or so until both sides are golden brown with crispy spots. This entire process should take about 3-4 minutes per paratha.