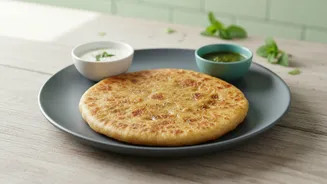





It All Starts with the Dough
The foundation of a great paratha is the dough. For a texture that is both soft and crispy, whole wheat flour (atta) is the traditional choice. While some recipes might mix in a little all-purpose flour for extra crispness, atta provides the ideal chewy
base. The key is to create a dough that is soft and pliable, but not sticky. Use warm water, as it helps make the paratha softer. The dough should be kneaded until smooth and then, crucially, allowed to rest for at least 20-30 minutes. This resting period allows the gluten to relax, which makes the dough easier to roll and prevents it from shrinking back. A well-rested dough is less likely to tear and requires less dry flour during rolling, which can prevent a tough final product.
Choose Your Fat Wisely
To get those coveted layers and a non-greasy finish, what you use for fat and when you use it is critical. Ghee is the traditional choice for a reason. It has a high smoke point of around 485°F, which means it can handle the heat of the tawa without burning like butter would. This high smoke point is essential for getting those golden spots without creating excess smoke or a burnt taste. While oil can be used, it often results in a softer, less crispy paratha and lacks the nutty, caramelised flavour that ghee imparts. The real secret is using the fat for layering, not just for cooking. Brushing a thin layer of melted ghee onto the rolled-out dough before folding creates steam pockets during cooking, which separate the layers and create that signature flakiness.
Master the Heat of the Tawa
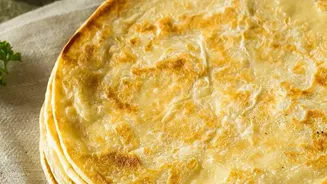
Temperature control is non-negotiable for a perfect paratha. A common mistake is cooking on excessively high heat, which burns the outside before the inside can cook, or on heat that's too low, which can lead to a soggy, greasy result. The sweet spot is a preheated tawa or cast-iron skillet over a medium to medium-high flame. The pan should be hot enough that when the paratha hits it, it begins to cook immediately. Cook the first side for about 30-60 seconds, or until small bubbles start to appear, then flip. Only after the first flip should you apply a light brushing of ghee. Flipping it a few more times while gently pressing the edges with a spatula encourages the paratha to puff up, ensuring the interior layers cook through evenly.
Technique Makes Perfect
Beyond the ingredients and heat, your technique plays a huge role. For flaky layers, rolling and folding are key. After rolling the dough into a thin circle, brush it with ghee and sprinkle a tiny amount of flour over it. This helps keep the layers separate. From there, you can fold it into a triangle, a square, or pleat it like a fan and roll it into a spiral for round lachha parathas. When rolling the folded dough, use gentle, even pressure to avoid squashing the layers you just created. During cooking, applying too much ghee or oil on the tawa is a common cause of greasiness. Instead of pouring oil into the pan, lightly brush it directly onto the surface of the paratha after the first flip. This method gives you complete control, ensuring a crisp exterior without letting the flatbread soak in a pool of fat.