


The Great Tawa Debate
Let's get this out of the way first. Is a heavy cast-iron tawa the ultimate tool for crispy dosas? Yes, it can be fantastic. Cast iron retains heat exceptionally well, which helps in achieving an even, golden-brown colour and that signature crispness.
However, it requires careful seasoning—a process of baking oil onto the surface to create a natural non-stick layer. Without proper seasoning, your batter will stick, leading to frustration. Non-stick tawas are a convenient, beginner-friendly alternative. They require less oil and maintenance, but the crispiness might not be quite the same as what cast iron can offer. The takeaway is simple: a well-managed tawa of either type can work. The real secrets to success lie elsewhere.
It All Begins with the Batter
The heart and soul of any dosa is the batter. Getting the ratio of ingredients right is the first critical step. A common and effective ratio is 4:1 of rice to urad dal (skinned black gram). Some recipes also include a small amount of chana dal for a nuttier flavour and better colour, or fenugreek (methi) seeds to aid fermentation. Another popular secret for extra crispiness is adding a handful of poha (flattened rice) or a spoonful of cooked rice to the batter before grinding. These additions help create a lighter, lacier texture when the dosa is cooked.
The Science of Fermentation
This is where the magic truly happens. Fermentation is a non-negotiable step for authentic flavour and texture. After grinding the soaked ingredients into a smooth paste, the batter needs to rest in a warm place for at least 8 to 12 hours. During this time, natural yeasts and bacteria get to work, producing carbon dioxide that leavens the batter, making it airy and light. This process also creates the characteristic slightly sour taste. A properly fermented batter will have nearly doubled in volume and be filled with tiny bubbles. Under-fermented batter is a common reason for soft, pale dosas that refuse to crisp up.
Perfecting the Pan Temperature
The temperature of your tawa is just as important as the batter itself. If the tawa is too hot, the batter will cook and stick the instant it touches the surface, making it impossible to spread thin. If it's not hot enough, the dosa will soak up oil and turn out soft and greasy. The ideal temperature is a medium-high heat. The classic test is to sprinkle a few drops of water on the pan; if they sizzle and evaporate immediately, you're ready to go. It's also a good practice to grease a cast-iron tawa by rubbing it with half an onion dipped in oil before pouring each dosa. This seasons the pan and helps prevent sticking.
Technique, Timing, and Patience
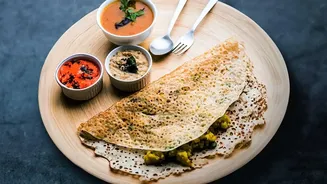
Once your batter and tawa are ready, it comes down to technique. Don't use cold batter straight from the fridge; let it come to room temperature first for about 15–20 minutes. The batter's consistency should be pourable but not watery—similar to thick buttermilk. Pour a ladleful of batter into the centre of the hot tawa and, using the back of the ladle, quickly spread it outwards in a thin, even, circular motion. Drizzle a little oil or ghee around the edges and on top, and then be patient. Let it cook until the edges start to lift away from the pan and the surface looks golden brown. Flipping too early is a common mistake that can tear the dosa.