



Gather Your Supplies
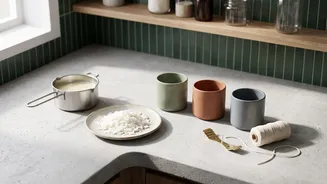
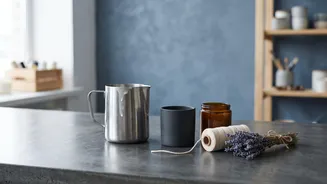
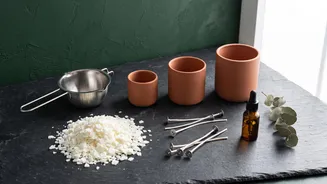
Before you begin, you'll need to gather a few key items. Many of these can be found at craft stores or online candle supply shops. For beginners, soy wax flakes are a great choice as they burn cleanly and are forgiving with temperatures. You will also
need wicks with metal bases, a heat-proof container for your candle (like a glass jar or tin), and a fragrance oil specifically designed for candles. For tools, you'll need a double boiler to melt the wax safely. If you don't have one, a heat-safe pitcher or bowl placed inside a larger pot with simmering water works perfectly. A kitchen thermometer, a stirring utensil like a wooden skewer, and something to hold the wick in place, such as clothespins, are also essential.
Prepare Your Workspace
Safety and preparation are key to a smooth process. Lay down paper towels or newspaper to protect your surfaces from wax spills. Work in a well-ventilated area to avoid being overwhelmed by fragrance fumes. Ensure your candle containers are clean and completely dry before you start. Have all your equipment within reach so you aren't scrambling while handling hot wax. It's also wise to wear clothes you don't mind getting a little messy and closed-toe shoes to protect from any splashes. Never leave melting wax unattended.
Melt the Wax
The safest way to melt candle wax is with a double boiler. Fill your larger pot with a few inches of water and bring it to a simmer. Place your pouring pot or heat-safe bowl containing the wax flakes inside the larger pot. The steam will gently melt the wax without scorching it. Stir occasionally as the wax melts. Use your thermometer to monitor the temperature, aiming for about 170-185°F (76-85°C). Once the wax is completely melted and clear, you can remove it from the heat.
Secure the Wick and Add Fragrance
While the wax is melting, prepare your jars. Dip the metal tab of your wick into the melted wax and press it firmly into the bottom center of your container. You can also use a hot glue gun or a wick sticker for a more secure hold. Use a clothespin or a wick-centering tool laid across the top of the jar to hold the wick straight and centered. After removing the wax from the heat, it's time to add your fragrance. Let the wax cool slightly, to around 135-140°F (57-60°C), before adding the fragrance oil. Pouring too hot can cause issues like a rough surface on your finished candle. A general rule is to use about 1 ounce of fragrance oil per pound of wax. Stir gently but thoroughly for about 30 seconds to ensure the oil is evenly distributed.
Pour and Let It Cure
With your wick centered and fragrance mixed in, it's time to pour. Pour the wax slowly and steadily into your container to avoid air bubbles. Leave about a half-inch of space at the top. If the wick shifts during pouring, gently nudge it back to the center before the wax starts to set. Now comes the hardest part: waiting. Place the candle in a safe place at room temperature, away from drafts, where it can cool undisturbed. For the best results, you need to let the candle 'cure' for at least a week before lighting it. This curing time allows the fragrance oil to fully bind with the wax, resulting in a much stronger scent when you finally burn it. Once cured, trim the wick to about 1/4-inch above the wax surface, and your homemade candle is ready to enjoy.