




Why Rings Change the Game
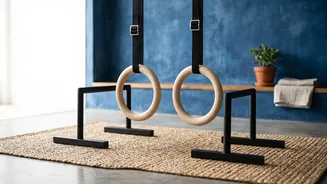
At a glance, a ring dip looks similar to a standard parallel bar dip. Both are phenomenal exercises for building the chest, triceps, and shoulders. But the moment you grab a pair of gymnastic rings, you discover the key difference: instability. Unlike
fixed bars, rings are free to move in any direction. This forces your body to work much harder. It's no longer just about pushing your bodyweight; it's about controlling it through space. This instability is a feature, not a bug. It recruits dozens of smaller stabilizing muscles around your shoulder joint, in your core, and even in your forearms that are often neglected in more stable movements. This leads to more comprehensive strength and improved joint health.
The Upper-Body Powerhouse
Ring dips are a compound movement, meaning they work multiple muscle groups simultaneously. The primary movers are the pectoralis major (chest), the triceps brachii (back of the arms), and the anterior deltoids (front of the shoulders). However, the instability of the rings significantly increases the demand on these muscles and brings others into play. Your rotator cuffs and scapular stabilizers work overtime to keep your shoulders in a safe and strong position. Your lats engage to keep the rings close to your body, and your entire core must remain braced to prevent unwanted swaying. The result is a more functional and holistic development of upper-body strength compared to many machine or fixed-bar exercises.
Mastering the Perfect Form
Proper form is crucial to reap the benefits and avoid injury. Start by adjusting the rings to about stomach height. Begin in the 'support position': hold the rings with straight arms, elbows locked, and shoulders pulled down and back, away from your ears. Your hands should be close to your body. From here, initiate the descent by bending your elbows. Lower yourself with control until your shoulders are slightly below your elbows, keeping the rings tucked in. Avoid letting your shoulders roll forward. Once at the bottom, press forcefully back up to the starting support position, fully extending your arms. Many advanced practitioners turn their hands outwards at the top (known as RTO or 'ring turn out') for added shoulder stability. Move slowly and deliberately, especially on the way down.
Your Path to the First Rep
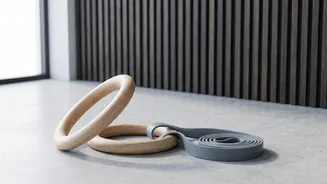
Few people can perform a perfect ring dip on their first try. Progression is key. If you're not there yet, start with foundational exercises. First, master the top support hold. Simply holding your bodyweight with straight arms on the rings for 30-60 seconds builds immense stability. Next, practice negative dips: jump to the top position and lower yourself as slowly as possible, taking 3-5 seconds for the descent. You can also use resistance bands, either looped over the rings to support your knees or feet, to reduce the amount of weight you have to lift. Stationary dips on parallel bars or a bench are also a great way to build the initial pushing strength required. Be patient and consistent with these progressions before attempting the full movement.
Programming Dips Into Your Workout
Because ring dips are so demanding, they should be treated as a primary strength movement. This means performing them early in your workout, after a thorough warm-up, when your muscles are fresh. For those building strength, a good starting point is 3-5 sets of 3-5 controlled repetitions. Focus on perfect form over high numbers. As you become more proficient, you can increase the reps, aiming for sets of 5-8 or more. Once you can comfortably perform multiple sets of 8-10 reps, you can consider adding difficulty with a weighted vest, but only when your form is flawless. Given their intensity, performing ring dips 1-2 times per week is generally sufficient for most advanced training programs, allowing adequate time for recovery and muscle growth.