





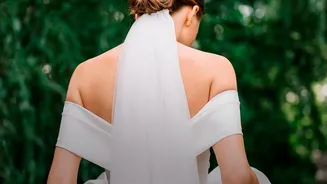
Start with the Right Foundation
For the best results, stylists often recommend working with second or third-day hair. Hair that isn't freshly washed has more natural grit and oil, which helps products grip better and provides a more secure hold. If you must start with clean hair, that’s
fine too. Just make sure it's completely dry before you begin styling, as wet hair is more prone to breakage when pulled into a tight style. If your hair is dry, you can lightly mist it with water to make it easier to control. Before styling, applying a texturizing spray or a lightweight conditioning mist can add grip and a subtle sheen.
Product Selection is Key
Achieving that flawless, glass-like finish depends on layering the right products. For fine hair, a lightweight smoothing cream or pomade will provide hold without weighing it down. For thicker or coarser hair, a stronger styling paste, gel, or wax is needed to keep strands flat and in place. A popular technique involves mixing a small amount of hair gel with a few drops of hair oil to get both hold and shine. A boar bristle brush is an essential tool; its dense bristles are perfect for smoothing hair, eliminating bumps, and distributing product evenly for a reflective finish.
Create a Flawless Part and Ponytail
Use a tail comb to create a precise, sharp part. A clean middle part offers a contemporary look, while a deep side part can feel more dramatic and classic. The secret to avoiding bumps is to section your hair. First, brush the back section of your hair down towards the nape of your neck, keeping the tension firm. Secure this into a tight, low ponytail with a strong hair tie. Some experts recommend using two elastics or a bungee-style hair tie for an extra-secure hold that won't sag. Once the back is secured, apply your chosen styling gel or cream to the front sections. Then, using your boar bristle brush, smooth these sections back to join the ponytail, wrapping them around the base and securing them with a second hair tie.
Twist and Secure the Bun
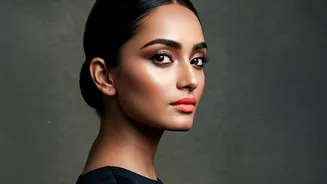
Now that you have a perfect, bump-free low ponytail, it’s time to create the bun. For a simple, polished look, twist the length of the ponytail tightly into a spiral. Wrap this spiral closely around the base of the ponytail to form the bun. Secure it firmly with another elastic or, for a more professional hold, use U-shaped hairpins or bobby pins that match your hair colour. For added texture, you can first braid the ponytail before twisting it into a bun. This adds visual interest, especially for more formal events.
The Final Polishing Touches
The final step is all about achieving a pristine finish. Tame any stubborn flyaways or baby hairs along your hairline using a dedicated edge control product on a small brush or a clean toothbrush. A wax stick is also excellent for targeted control and adding a glossy finish to any pieces that won't stay down. Once you are happy with the shape, give your entire head a generous misting of a strong-hold hairspray. This will lock everything in place and ensure your sleek bun lasts all day and all night. For an extra touch of glamour, you can add accessories like pearl pins, a decorative comb, or even small, fresh flowers tucked into the side of the bun.