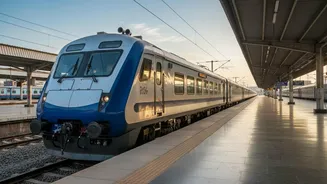








Understanding the Token System
Indian Railways has implemented a token system at various Passenger Reservation System (PRS) counters to manage the intense rush for Tatkal tickets. Instead of waiting in long, uncertain queues for hours, passengers now collect a numbered token that determines
their place in the booking line. This system is designed exclusively for offline Tatkal bookings at physical counters and does not apply to online bookings via the IRCTC website or app. The goal is to create a more organised and efficient process, ensuring that passengers are served in a sequential order based on their token number. Once you have a token, you can wait for your number to be called, eliminating the need to stand in line for the entire duration.
Timing is Everything: Token and Booking Windows
Success with the new system hinges on understanding two critical time slots: token distribution and ticket booking. The timings are different for AC and non-AC classes. For AC classes (AC Chair Car, 3A, 2A), tokens are typically distributed between 8:30 AM and 9:00 AM. The actual ticket booking for these classes begins at 10:00 AM. For non-AC classes, including Sleeper Class, the token distribution window is generally from 9:00 AM to 9:30 AM, with some reports extending it to 10:00 AM. The booking for non-AC tickets then commences at 11:00 AM. It's crucial to arrive at the station within the specified token distribution window for your desired class of travel to secure a spot in the queue.
Your Essential Documents: Photo ID and Forms
Arriving on time is only half the battle; you must also have the correct documents ready. A valid, original government-issued photo ID is mandatory. Accepted forms of identification include an Aadhaar Card, Passport, Voter ID, Driving Licence, or PAN Card. It is advisable to have the reservation form completely filled out before you reach the counter to save precious time. You can book a maximum of four passengers on a single Tatkal PNR. Ensure all passenger details on the form are accurate and match their respective IDs. Some stations have also introduced priority categories, giving preference to passengers booking for themselves or their immediate family members, which may require proof of relationship.
The Step-by-Step Counter Process
The process is now more structured. First, visit the railway reservation office during the designated token distribution time for your travel class. Collect your token from the designated railway staff. This token is non-transferable. After receiving your token, you can wait nearby until the main booking window opens. Once booking commences (10:00 AM for AC, 11:00 AM for non-AC), listen for announcements or watch the display for your token number to be called. When your turn comes, proceed to the counter, submit your completed reservation form and photo ID, make the payment, and collect your ticket.
Know the Limits and Pro Tips
Initially, each counter is expected to issue a limited number of tokens, typically around 10 for AC classes and 15 for non-AC classes, though this can vary based on demand at the station. If tickets remain after all token-holders have been served, they are sold on a first-come, first-served basis to those without tokens. To maximize your chances, have all passenger details written down clearly to fill the form without errors. Double-check the train name, number, and journey date. Being prepared with the exact cash fare, or having a UPI app ready, can also speed up the final transaction at the counter once your token number is called.