




Location, Location, Location
The placement of your dessert table is the first and most critical decision. Avoid tucking it into a tight corner or against a wall where a line can quickly form and block movement. Instead, choose a spot that is easily accessible but not in a main thoroughfare.
If possible, use a table that guests can access from multiple sides, which naturally disperses crowds. The goal is to make the station a destination that draws people in without creating a bottleneck, encouraging guests to mingle rather than wait in a queue. If your event is in a dining room, ensure the dessert table is visible and accessible from where guests are seated to build anticipation.
Create a Logical Starting Point
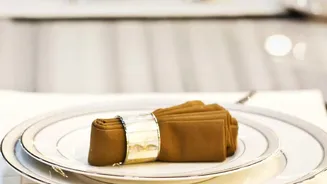
Every food station needs a clear beginning. Begin the flow by placing plates, napkins, and all necessary utensils at one end of the table. This simple step prevents guests from having to juggle food while trying to grab a plate or, worse, backtracking through the line. Think of it as setting the stage; everything your guests need to serve themselves should be the first thing they encounter. For larger events, consider placing napkins in a second location to further prevent a single point of congestion.
Use Height to Your Advantage
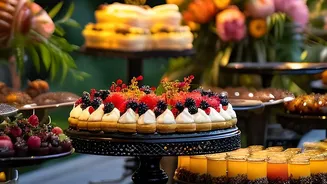
A flat table can look uninspired and make it difficult for guests to see all the options. Create visual interest and improve accessibility by using varying heights. Use tiered stands, cake pedestals, and even sturdy, fabric-draped boxes to elevate certain dishes. Place taller items, like a layer cake, towards the back or center, and smaller, flatter items like cookies or brownies in the front. This not only creates a more dynamic and professional-looking display but also allows guests to easily see and reach for different desserts without having to stretch over other food. This vertical arrangement makes the table feel more abundant and organized.
Arrange Food for Easy Access
Group desserts in a way that makes sense and facilitates quick choices. Cluster similar items together, like cupcakes in one area and fruit tarts in another. This helps guests scan their options efficiently. For desserts that require slicing, such as pies or large cakes, leave ample space around them for guests to comfortably cut a piece. Be sure to place a dedicated serving utensil next to every single dish. This is not only proper etiquette but also a crucial step for hygiene and preventing cross-contamination, especially with allergens. Popular items that you anticipate will be in high demand should be placed in easily reachable spots.
Label Everything Clearly
Clear, simple labels are your best friend for a smooth-flowing dessert station. Label each dessert so guests know exactly what they are choosing. This small detail speeds up the line, as people spend less time guessing. More importantly, it's an essential courtesy for guests with dietary restrictions or allergies. Clearly mark items that are gluten-free, nut-free, or vegan. This thoughtful step ensures everyone can indulge with confidence and makes the experience more inclusive and welcoming.
Separate the Drinks Station
If you plan to serve coffee, tea, or dessert wines, set them up at a separate station away from the food. Combining drinks and desserts at one table is a guaranteed recipe for congestion. Guests pouring coffee or waiting for tea will inevitably hold up those who are just trying to grab a cookie. A dedicated beverage station allows for better traffic flow and lets guests attend to their drinks without creating a logjam at the main dessert display.