



Curate Your Collection
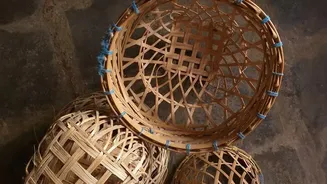
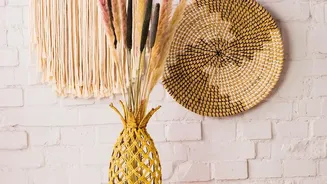
The first step is gathering your baskets. Look for a variety of sizes to create visual interest. While sticking to mostly round shapes creates cohesion, don't be afraid to mix in an oval or even a rectangular basket for a unique touch. A mix of textures
and patterns will add depth, but try to stick to a complementary colour palette to ensure the final arrangement looks curated rather than chaotic. You don't need a huge number to start; a small grouping can be just as impactful.
Plan Your Layout on the Floor
This is a crucial step that designers swear by: before a single nail goes into the wall, arrange your baskets on the floor. This allows you to play with the composition without leaving a trail of holes. Start by placing your largest or most interesting basket near the center to act as a focal point. Then, build outwards with your other baskets, trying different combinations. Arrange them until the spacing feels right and the overall shape is pleasing to the eye.
Snap a Photo for Reference
Once you have an arrangement you love on the floor, take a picture of it with your phone. This photo will be your guide when you start hanging. It's easy to forget the exact placement and spacing you perfected, and having a visual reference makes the transfer from floor to wall much smoother. You can also trace each basket onto paper and tape the templates to the wall to visualize the scale and placement before committing.
Achieve Visual Balance
Balance doesn't necessarily mean perfect symmetry. In fact, an asymmetrical layout often creates more visual interest. The key is to distribute the visual weight. For instance, balance a large basket on one side with a tight cluster of two or three smaller baskets on the other. Using an odd number of baskets—like five, seven, or nine—is a classic design trick that helps create a more dynamic and natural-looking arrangement. Play with keeping the baskets tightly grouped or allowing for more breathing room, depending on your style.
Hang Your Baskets Securely
For most flat woven baskets, a small finishing nail hammered gently through a gap in the center of the weave is all you need. This method is sturdy and keeps the basket flush against the wall. If you prefer not to put a nail through the basket itself, you can create a small loop on the back with fishing line and hang it on a small hook or nail. For a damage-free option, especially for renters, adhesive picture-hanging strips or hooks are an excellent alternative, provided you follow the weight limits specified on the packaging.
Step Back and Refine
Start by hanging your central, focal basket, using your reference photo to guide you. Work your way outwards, hanging the rest of the collection. Once all the baskets are up, step back and view the arrangement from different angles and distances. Don't be afraid to make small adjustments to the position or angle of a basket to perfect the overall look. Sometimes a slight tilt or a minor shift in spacing can make all the difference in achieving that perfect balance.