





Decoding the Wash-And-Go
Despite its breezy name, the wash-and-go is a deliberate styling method, not just a simple act of washing your hair and walking out the door. It is a technique designed to enhance and define your hair's natural texture as it is, without using tools to stretch,
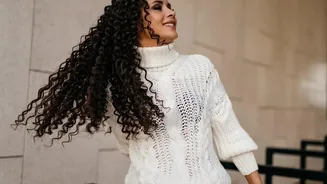
braid, or alter the curl pattern. The goal is to cleanse, hydrate, and apply styling products to soaking wet hair to encourage individual strands to form defined, clumped curls or waves that hold their shape as they dry. Popularized during the natural hair movement of the 2000s, it represents a celebration of hair as it grows from the scalp. The result is a low-manipulation style that showcases your true texture with definition and volume.
Your Essential Styling Toolkit
Success with a wash-and-go begins with the right products. While formulas vary based on hair type, a core collection is essential. Start with a clean slate using a gentle, sulfate-free shampoo to remove buildup without stripping natural oils. Follow with a deeply hydrating conditioner that has plenty of 'slip' to make detangling easier. The styling phase typically involves layering products on soaking wet hair. A leave-in conditioner provides a base layer of moisture. This is followed by a defining styler, which could be a curl cream, custard, mousse, or gel. Gels and custards are excellent for providing hold and creating a 'cast'—a temporary stiffness that locks in the curl pattern and prevents frizz while drying.
The Step-by-Step Application Process
The key to a defined, frizz-free result is applying products to soaking wet hair; some stylists even recommend styling in the shower. After cleansing and conditioning, do not towel-dry your hair. Working in sections, apply your leave-in conditioner. Follow this with your chosen styler. Use application techniques like the 'raking' method (using your fingers like a rake to distribute product) or the 'praying hands' method (smoothing sections of hair between your palms) to ensure every strand is evenly coated. For tighter textures, it’s crucial to work in smaller sections to ensure full product saturation from root to tip. Be generous with water, using a spray bottle to re-wet any sections that begin to dry.
Drying Your Curls Without Disturbance
Once your product is applied, the most important rule is to disturb your hair as little as possible while it dries. Any agitation can disrupt the curl clumps you've created and lead to frizz. You have two primary drying options: air-drying or using a diffuser. Air-drying is the simplest method and involves letting your hair dry naturally. A diffuser attachment on your blow dryer works by softening the airflow, which helps to dry the hair and build volume without creating frizz. For tighter curls, it's often recommended to wait until the hair is at least 60% dry before beginning to diffuse to maximize definition. Regardless of the method, wait until your hair is 100% dry before touching it further.
Troubleshooting and Finishing Touches
If your hair feels crunchy or stiff once it's fully dry, this is simply the 'cast' from your styling gel doing its job. This is a good sign, as it means your style is locked in. You can easily soften it by gently 'scrunching out the crunch' with your hands. Applying a small amount of a lightweight oil to your hands before scrunching can help add shine and further soften the hold. If you find your results are frizzy, it often means more water or more product was needed during the application stage. Another common mistake is not starting with a completely clean scalp, as product buildup can prevent stylers from working effectively. Remember that the wash-and-go look is unique to your hair; it is meant to enhance your curls, not create a different curl pattern.