


Step 1: Choose Your Plant and Take a Cutting
Success begins with a healthy parent plant. Look for a robust, disease-free specimen to take your cutting from. For most common houseplants like Pothos (money plant), Philodendron, or Spider Plants, you'll want to take a stem cutting. Using clean, sharp
scissors or pruning shears, snip a 4 to 6-inch piece of stem from the plant. The ideal cut is just below a node — the small bump on the stem where a leaf grows. Roots emerge most easily from these points. Avoid stems that have flowers or buds, as they divert energy away from root development.
Step 2: Prepare the Cutting for Rooting
Once you have your cutting, a little preparation goes a long way. Gently remove the leaves from the lower half of the stem—any part that will be below the surface of your rooting medium (water or soil) should be bare. Leaving leaves submerged can cause them to rot, which can spoil the entire effort. Typically, leaving just two or three leaves at the top of the cutting is sufficient. This reduces water loss through transpiration and helps the cutting focus its energy on growing new roots instead of supporting excess foliage.
Step 3: Decide on Water or Soil
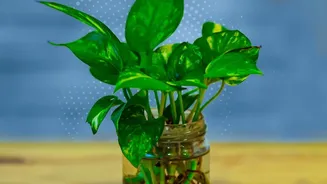
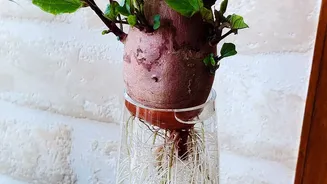
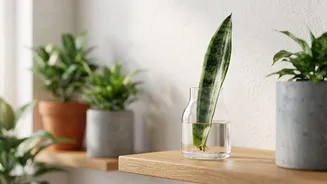
You have two main options for rooting your cutting: water or soil. Many beginners find success with water propagation because it's easy to see the roots as they form. Simply place the prepared cutting in a jar of clean water, ensuring at least one node is submerged. Change the water every few days to keep it fresh. Alternatively, you can plant the cutting directly into a rooting medium. A well-draining, soil-less mix is ideal, such as a combination of perlite, vermiculite, or sand mixed with peat moss. This provides both moisture and aeration, which are crucial for root development.
Step 4: Use a Rooting Hormone (Optional but Recommended)
While not strictly necessary for easy-to-root plants like Pothos, a rooting hormone can significantly increase your chances of success and speed up the process, especially for woodier or more difficult plants. These products, which come in powder, gel, or liquid form, contain compounds that mimic natural plant hormones called auxins, stimulating root growth. If using a powder, pour a small amount into a separate dish, dip the moist, cut end of the stem into it, and tap off any excess before planting. This simple step helps prevent rot and encourages a more robust root system to form.
Step 5: Create a Humid Environment
Until it grows roots, a cutting can't absorb water effectively and is vulnerable to drying out. To combat this, you need to create a warm, humid environment. If you've planted your cutting in soil, you can cover the pot with a clear plastic bag or a plastic dome to trap moisture. Make sure the bag doesn't touch the leaves. Place your cutting in a spot that receives bright, indirect light, as direct sunlight can be too intense and scorch the delicate plant. Keep the rooting medium consistently moist but not waterlogged to prevent rot.
Step 6: Be Patient and Transplant
Rooting time can vary widely depending on the plant, from a few weeks to over a month. If rooting in water, you'll be ready to transplant when the new roots are about two to four inches long. If rooting in soil, you can give the cutting a very gentle tug; if you feel resistance, it means roots have formed. Once a healthy root system is established, you can move your new plant into a slightly larger pot with standard potting soil. Water it thoroughly and continue to care for it as you would its parent plant, and watch your collection grow.