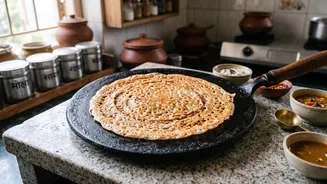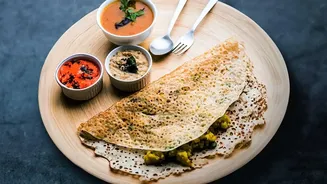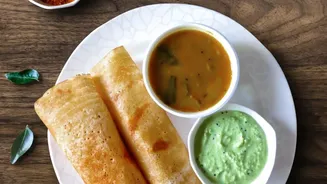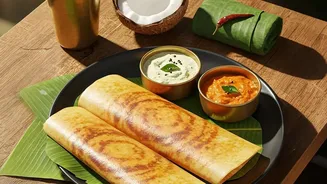



The sound of batter sizzling on a hot pan, the sight of a golden, paper-thin crepe lifting at the edges. Achieving that perfect, restaurant-style crispy dosa at home feels like a culinary triumph, and the secret lies in an old tradition.
Why Cast Iron Is the Dosa's Best Friend
For generations,
the heavy, dark cast iron tawa has been a fixture in Indian kitchens for a reason. Unlike modern non-stick pans with synthetic coatings, cast iron is valued for its superior heat retention. It heats up slowly but holds a steady, even temperature across its entire surface, which is crucial for cooking the dosa uniformly without hot spots or burnt patches. This consistent heat is what creates that signature crispy texture on the outside while keeping the inside soft. Over time, with proper care, a cast iron pan develops a natural non-stick surface called a patina. This seasoned layer not only prevents sticking but also enhances the flavour of the food, giving dosas an authentic taste that's hard to replicate. Plus, it's incredibly durable, often passed down through generations.
The Art of Seasoning Your Tawa
An unseasoned or poorly maintained cast iron pan is the primary reason for dosas sticking. Seasoning is the process of baking oil onto the iron to create that protective, non-stick layer. If you have a new tawa, start by washing it with mild soap and water, then drying it completely on the stove to prevent rust. Apply a thin layer of a high-smoke-point oil (like sesame or vegetable oil) over the entire surface. Heat the tawa on a medium flame for 10-15 minutes until it starts to smoke lightly. Let it cool and wipe off any excess oil. This process can be repeated a few times to build a strong initial layer. For daily maintenance, simply wipe the pan clean after use, dry it on the flame, and apply a light coating of oil before storing.
Step-by-Step to the Perfect Crispy Dosa
With a well-seasoned tawa, you are halfway there. The right technique will do the rest. First, ensure your batter is at room temperature and has the consistency of thin cream; cold or thick batter won't spread well. Heat the tawa on medium for several minutes. Test it by sprinkling a few drops of water; they should sizzle and evaporate almost instantly. If the pan is too hot, it can seize the batter, so rub it with a halved onion dipped in oil to cool it slightly and grease it simultaneously. Pour a ladle of batter in the center and, using the back of the ladle, quickly spread it outwards in a single, smooth spiral motion. Drizzle a little oil or ghee around the edges. Now, be patient. Wait until the edges turn golden brown and begin to lift on their own. This is your cue that the dosa is cooked and ready to be lifted with a thin spatula. Trying to flip it too early will cause it to tear.
Troubleshooting Common Dosa Disasters
Even with practice, things can go wrong. Here are some quick fixes. If your dosa sticks, the most likely culprits are an improperly heated tawa (either too hot or not hot enough) or a pan that needs better seasoning. Always preheat your pan thoroughly. If the dosa is soft instead of crispy, you may be spreading the batter too thickly or covering the pan with a lid, which traps steam. Aim for the thinnest layer possible and never cover the dosa while it cooks. If your batter is clumping instead of spreading, your tawa is probably too hot. Splash a little water on it and wipe it down to regulate the temperature before pouring the next one. Remember that each cook and stove is different, so a little trial and error is part of mastering the technique.