





The Frustration of an Uneven Burn
Candle tunneling is one of the most common issues for novice and even experienced candle makers. It happens when only the wax directly around the wick melts, creating a narrow hole that burns deeper with each use. This not only wastes a significant amount
of wax and fragrance but also dramatically shortens the candle's life. Eventually, the wick can become submerged in its own small melt pool, making it difficult to light. An off-center wick is a primary cause of this problem, as it heats one side of the candle more than the other, creating a lopsided, inefficient burn. This can also lead to unsightly soot stains on one side of the jar.
The Simple Science of a Candle Flame
To understand why placement is so critical, it helps to know how a candle actually works. The wick isn't just a string you light; its job is to draw molten wax upward through a process called capillary action. This liquid wax is the fuel for the flame. The heat from that flame then radiates outward, melting the surface of the candle into what's known as a 'melt pool'. For a perfect, even burn, this melt pool must extend all the way to the edges of the container. When the wick is perfectly centered, it distributes heat evenly in all directions, allowing the entire surface to melt at the same rate.
Why Centering is Non-Negotiable
When a wick is off-center, the flame is closer to one side of the jar. That side gets too hot, while the opposite side remains too cool to melt properly. This imbalance is what creates the dreaded tunnel. Beyond being wasteful, a wick that leans too close to the glass poses a safety risk. The concentrated heat can cause the glass to overheat and, in worst-case scenarios, even crack. This is why you should always treat a significantly off-center wick as a flaw to be corrected, not just a cosmetic imperfection. If you notice a lit candle has a wandering wick, extinguish it immediately and gently guide it back to the center with a tool like tweezers once the wax is slightly cooled.
Sizing Matters Just as Much
While centering is key, it's only one part of the equation. The size, or diameter, of your wick must be appropriate for the diameter of your container and the type of wax you're using. A wick that is too small won't generate enough heat to create a full melt pool, leading to tunneling no matter how perfectly it's centered. Conversely, a wick that's too large will create an excessively large flame, which can produce soot, smoke, and burn through the candle far too quickly. Most candle supply companies provide wick sizing charts to help you choose the right one, but testing is always the best way to confirm your choice.
The Secret of the First Burn
Believe it or not, candles have a 'memory'. The very first time you light a candle sets the boundary for every subsequent burn. This is called the 'memory ring'. If you extinguish the candle before the molten wax has reached the edges of the container, you are essentially telling the candle to stop there forever. The next time you light it, it will only melt out to that same, smaller diameter, initiating a tunnel. The rule of thumb is to let a new candle burn for approximately one hour for every inch of its diameter. For a three-inch wide candle, that means a three-hour first burn to establish a healthy, wide memory ring.
Tools and Tricks for Perfect Placement
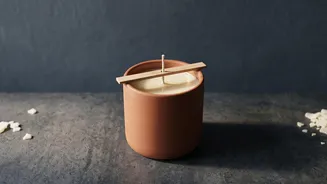
Securing your wick in the exact center is simple with the right tools. The most common method involves using a wick sticker or a dab of hot glue to affix the metal tab at the base of the wick to the bottom of your clean, dry jar. Then, as you pour the wax, a wick centering tool, wick bar, or even a simple clothespin or two popsicle sticks laid across the jar's rim can be used to hold the top of the wick taut and perfectly centered while the wax cools and solidifies. This ensures the wick stays straight from top to bottom, setting you up for a flawless burn.