

The Ultimate Anytime Snack
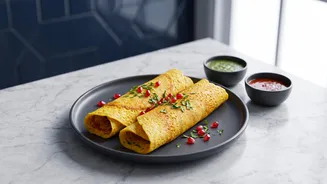
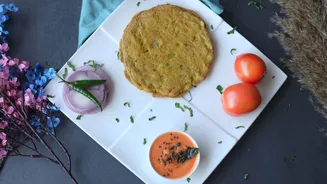
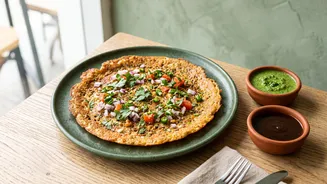
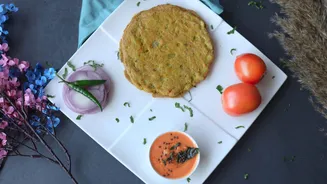
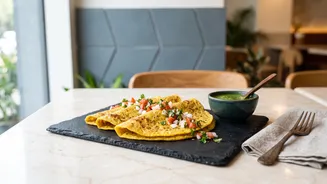
Moong dal chilla, a savoury pancake made from split mung lentils, is a beloved staple across India. Known as 'puda' or 'pudla' in some regions, this versatile dish shines as a quick breakfast, a light lunch, or a satisfying evening snack. Its popularity
stems not just from its delicious taste but also its incredible health profile. Moong dal is a powerhouse of plant-based protein and dietary fibre, which aids in digestion and helps keep you feeling full longer. Rich in essential minerals like potassium and magnesium, it also supports heart health and may help in regulating blood pressure. Because the batter is made from soaked lentils rather than flour, it’s naturally gluten-free and easier on the digestive system, making it an excellent choice for everyone in the family.
Gather Your Ingredients
The beauty of moong chilla lies in its simplicity. You only need a few basic ingredients to create the foundational batter, with plenty of room for customisation.For the Batter: 1 cup split moong dal (either yellow or with skin/chilka will work). 1-inch piece of ginger. 1-2 green chillies, adjusted to your spice preference. A pinch of asafoetida (hing). ¼ teaspoon turmeric powder. ½ teaspoon cumin seeds. Salt to taste. Water for soaking and grinding.For the Filling & Topping (Optional but Recommended): Finely chopped onions. Grated carrots. Chopped coriander leaves. Crumbled paneer (cottage cheese). Chaat masala for sprinkling.
Prep Work: Let Soaking Do the Heavy Lifting
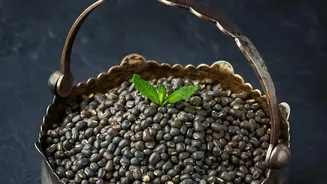
The key to a perfect chilla batter is patience. Start by rinsing the moong dal thoroughly under running water until the water runs clear. Then, soak the dal in ample water for at least 3 to 4 hours, or even overnight. You'll notice the lentils will swell to more than double their original size. Once soaked, drain the water completely. Transfer the soaked dal to a blender along with the ginger, green chillies, cumin seeds, turmeric, hing, and salt. Add about half a cup of water and blend to a smooth, flowing paste. The consistency is crucial—it should be similar to dosa batter, not too thick like a paste and not too watery. If it’s too thick, add a tablespoon of water at a time until you reach the desired consistency. Once blended, you can stir in your chopped onions, carrots, and coriander leaves.
Cooking on the Tawa with Minimal Oil
To achieve that street-style texture, a well-heated tawa is essential, whether it's non-stick or a seasoned cast-iron one. Heat your tawa over a medium flame. To test if it's ready, sprinkle a few drops of water; they should sizzle and evaporate immediately. Lightly grease the surface with just half a teaspoon of oil, using a silicone brush or a piece of onion to spread it evenly. Pour a ladleful of the batter onto the center of the hot tawa. Working quickly, use the back of the ladle to spread the batter outwards in a circular motion, forming a thin, even pancake. Drizzle a few more drops of oil around the edges. Let it cook for 2-3 minutes, or until the top surface looks dry and the edges begin to lift away from the pan. This is your cue to flip. Cook the other side for another minute or two until it's golden brown and cooked through.
Pro-Tips for That Perfect Crisp
Getting your chilla just right—crispy at the edges with a soft center—is an art. Here are some tips to master it: Maintain Tawa Temperature: A common mistake is a tawa that's either too hot or not hot enough. If it's too hot, the batter will clump and won't spread. If it's too cool, it will stick. Medium heat is your friend. Season Your Tawa: For a cast-iron tawa, proper seasoning is key to making it naturally non-stick. Before making the first chilla, rub the hot surface with half a cut onion or a potato dipped in oil. Batter Consistency: If your batter is too thick, the chilla will be dense like a pancake. If it’s too thin, it might break. Aim for a pourable consistency that spreads easily. Flip with Confidence: Wait until the edges naturally crisp up and pull away from the pan before attempting to flip. Trying to lift it too early will cause it to tear. Add Fillings at the Right Time: If you're adding paneer, sprinkle it over the chilla after you flip it and it’s almost cooked. This warms the paneer without making it messy.