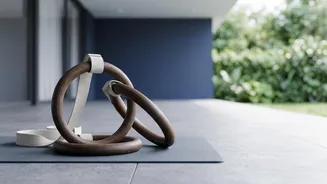









Among the toughest upper-body exercises, the ring dip stands out. Its power comes from one key challenge: instability. This guide explains how to master this movement, build functional strength, and how to start safely with assisted progressions.
The Ultimate Upper-Body Challenge
If you
have ever seen gymnasts, with their impressive upper-body development, you have seen the power of gymnastic rings. The ring dip is a foundational movement in this discipline and for good reason. Unlike dips on stable parallel bars, ring dips are performed on two freely moving rings. This instability is not a drawback; it is the main benefit. The constant need to control the rings forces your body to recruit a wide range of stabiliser muscles in your shoulders, chest, and core that are often neglected in other exercises. This makes it a superior exercise for developing not just raw pressing power, but also exceptional stability and body control.
Key Benefits: More Than Just Muscle
Performing ring dips correctly offers a host of advantages. The primary muscles worked are the triceps, chest (pectorals), and front shoulders (anterior deltoids). However, the unstable nature of the rings requires significant contribution from the rotator cuff muscles, lats, and even your biceps to keep the movement steady. This enhanced muscle recruitment can lead to greater overall muscle growth and strength gains compared to stable-surface exercises. Furthermore, because the rings allow your hands and joints to rotate naturally through the movement, many find ring dips to be friendlier on the wrists, elbows, and shoulders than their fixed-bar counterparts once proper form is established.
How to Perform a Perfect Ring Dip
Proper form is non-negotiable to reap the benefits and avoid injury. Start by setting the rings to a height where your feet do not touch the ground at the bottom of the dip. 1. The Support Hold: Begin by getting above the rings with your arms fully extended and locked. Your palms should be facing in or slightly turned out. Keep your shoulders down and back, away from your ears, and your chest proud. This stable starting point is called a 'support hold'. 2. The Descent: Initiate the movement by bending your elbows to lower your body. Keep your elbows tucked close to your sides. Descend in a controlled manner until your shoulders are slightly lower than your elbows, feeling a stretch in your chest. 3. The Ascent: Drive forcefully through your palms to press yourself back up to the starting support hold position. As you reach the top, turn your palms to face forward (external rotation). This is crucial for shoulder health and stability. Lock your elbows completely to finish the repetition.
Common Mistakes to Avoid
Several common errors can compromise safety and effectiveness. A primary mistake is allowing the elbows to flare out wide, which puts unnecessary stress on the shoulder joint. Another is hunching over and letting the shoulders shrug up towards the ears, which indicates a loss of stability. Many people also fail to go deep enough, cutting the range of motion short, or they don't achieve a full lockout at the top with the rings turned out. Performing the repetitions too quickly without control is another frequent issue that negates the stability benefits.
Your Progression to the First Full Rep
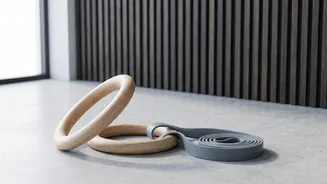
Very few people can perform a ring dip on their first try. Building up to it requires a smart, patient progression. Start by mastering foundational exercises like push-ups and stationary bar dips to build baseline strength. Support Holds: The first step on the rings is simply holding the top 'support hold' position for time. This builds the initial stability and shoulder strength needed. Foot-Assisted Dips: Set the rings low enough that you can perform the dip motion with your feet on the floor, either in front or behind you. This allows you to control how much of your bodyweight you are lifting. Resistance Band Dips: Loop a thick resistance band over both rings and place your knees or feet in the band. The band will provide the most assistance at the bottom of the dip, which is the hardest part of the movement. As you get stronger, you can use thinner bands. Negative Dips: Focus only on the lowering portion of the exercise. Jump or use a box to get to the top support position, then lower yourself as slowly and controlled as possible, aiming for a 3-5 second descent.