







More Than Just Softening: The Real Goal of Soaking
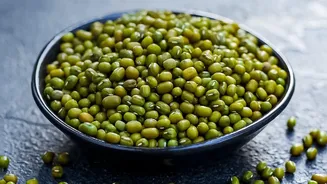
Every good Pesarattu begins with soaking whole green gram, or moong dal. Most home cooks know this step is essential for softening the tough legumes, making them easy to grind into a smooth batter. Hydration is certainly the primary goal; soaking allows
water to penetrate the grain, swelling it and preparing it for the blender. An ideal soaking time is between four to six hours. Anything less, and the batter might be gritty. Anything more, and you risk making the Pesarattu too soft. But the process does more than just soften. Soaking also kick-starts enzymatic activity within the dal, beginning the process of breaking down complex starches and proteins. This initial step is the foundation for the texture to come, making the nutrients more accessible and preparing the batter for the magic that happens next.
The Crucial Pause: What Happens When Batter Rests
While Pesarattu batter doesn't require the long fermentation of a traditional urad dal dosa, allowing the ground batter to rest for even a short period can be a game-changer. Though many recipes say you can cook it instantly, a resting period of anywhere from 30 minutes to a few hours allows for a very mild, natural fermentation. During this time, naturally present yeasts and bacteria, particularly lactic acid bacteria, begin their work. They consume the simple sugars in the batter and produce small amounts of carbon dioxide gas. This process subtly leavens the batter, creating microscopic air pockets that make it lighter and more aerated. This is why a rested batter often appears slightly fluffier and has a more complex, less 'raw' flavour. This gentle fermentation also helps in breaking down the batter further, leading to a smoother consistency that is easier to spread on the hot tawa.
From Batter to Griddle: The Textural Payoff
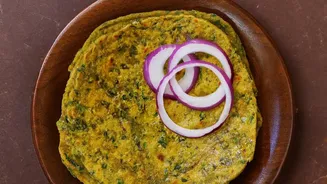
So, how does that resting period translate to a better Pesarattu? It all comes down to structure and spreadability. A batter that has rested is often slightly thinner and more manageable, allowing you to spread it into a perfectly thin, even circle on the griddle. The tiny air pockets created during the resting phase play a crucial role once the batter hits the heat. As the Pesarattu cooks, these pockets of gas expand, contributing to a texture that is simultaneously light and crisp. The breakdown of starches during soaking and resting also means there are more simple sugars available for the Maillard reaction—the chemical process responsible for that beautiful golden-brown color and delicious toasted flavour. A well-rested batter browns more evenly and develops a superior crispiness, especially around the edges, that is difficult to achieve with a freshly ground, dense batter.
Finding the Sweet Spot: How Long to Rest
The ideal resting time for Pesarattu batter is not set in stone and can depend on your kitchen's temperature. In the warmer climate typical of many Indian homes, a rest of 30 minutes to 2 hours is often sufficient to see benefits. Some recipes even suggest a fermentation time of up to 4-6 hours if you prefer a slightly tangy flavour, though this is not traditional. However, be cautious not to over-rest it. Unlike urad dal batters that thrive on long fermentation, Pesarattu batter can become too sour and may lose its structural integrity if left for too long, resulting in a dosa that is difficult to handle. For a classic, crispy Pesarattu, the goal is not full fermentation but a short, gentle activation. A brief rest after grinding is often the perfect compromise, enhancing texture without significantly altering the fresh, earthy taste of the green gram.
Common Mistakes and Quick Fixes
The most common mistake when making Pesarattu is rushing the process. Using the batter immediately after grinding is possible, but it often results in a thicker, heavier crepe that lacks that signature crispiness. Another frequent issue is over-soaking the dal. Soaking for more than seven or eight hours can lead to a very soft, almost pasty Pesarattu, as the gram becomes waterlogged. If your batter seems too thick to spread, it's better to return it to the blender with a tablespoon or two of water and blend again, rather than just stirring water in. This ensures the consistency is uniform. For an extra crisp texture, some cooks add a tablespoon of rice or rice flour to the batter, which helps create a brittle, crunchy finish, mimicking the texture found in many restaurants.