




The Appeal of Homemade Paneer
Making paneer at home is a cherished tradition in many Indian households. It offers a level of freshness and purity that can sometimes be missing from store-bought varieties. When you make it yourself, you control the ingredients, ensuring there are no
unwanted preservatives or additives. This control is empowering, but it also brings responsibility. The safety of the final product, from the texture to its microbial content, rests entirely in your hands. While the process is simple—requiring little more than milk and an acidic agent like lemon juice or vinegar—a few critical details can make the difference between a delicious meal and a serious health risk.
Understanding the Risk in Raw Milk
The primary safety concern begins with the main ingredient: milk. Raw, or unpasteurised, milk has not been heat-treated to kill harmful microorganisms. While some believe it offers superior flavour or nutrients, these claims are not scientifically supported and do not outweigh the risks. Raw milk can be a carrier for dangerous bacteria such as Listeria, Salmonella, E. coli, and Brucella. These pathogens can cause severe foodborne illnesses with symptoms ranging from vomiting and diarrhoea to more severe, life-threatening conditions like listeriosis or brucellosis. Pregnant women, children, older adults, and individuals with weakened immune systems are especially vulnerable to these infections. Listeria, in particular, poses a significant risk during pregnancy as it can lead to miscarriage or severe illness in a newborn.
Pasteurisation: Your First Line of Defence
The safest choice for making paneer is always commercially pasteurised milk. In India, the Food Safety and Standards Authority of India (FSSAI) sets strict guidelines for milk processing, ensuring that packaged milk is heat-treated to eliminate harmful bacteria. If you only have access to raw milk from a local dairy or vendor, you must pasteurise it at home before using it. This is a simple but non-negotiable step. The most common method involves using a double boiler to heat the milk gently. Heat the milk to at least 72°C (162°F) and hold it there for 15 seconds, or heat it to 63°C (145°F) and hold for 30 minutes. Use a clean food thermometer to be precise. Stir constantly to ensure the milk heats evenly. After heating, it is crucial to cool the milk rapidly by placing the pot in an ice-water bath to bring the temperature down to 4°C (40°F). This process kills dangerous pathogens while preserving the milk's suitability for making paneer.
Kitchen Hygiene is Non-Negotiable
Even if you start with pasteurised milk, poor kitchen hygiene can introduce contaminants. Cross-contamination is a major risk. Bacteria from raw meat, unwashed vegetables, or dirty surfaces can easily find their way into your paneer. Always start with a clean workspace. Wash your hands thoroughly with soap and water before you begin and after touching any other food items. Ensure all utensils—pots, spoons, and strainers—are impeccably clean. The muslin or cheesecloth used for straining the curds must also be sanitised. You can do this by boiling it in water for a few minutes and allowing it to cool before use. Do not use the same cutting board for paneer that you use for raw meats.
A Step-by-Step Guide to Safe Paneer
Once you have your pasteurised milk and clean equipment, follow these steps for perfect, safe paneer. First, bring the milk to a gentle boil in a heavy-bottomed pot over medium heat, stirring to prevent scorching. Once it boils, turn off the heat and add your acidic agent—lemon juice or vinegar—one tablespoon at a time. Stir gently until you see the milk solids (curds) clearly separate from the thin, greenish liquid (whey). If the whey still looks milky, you may need to add a little more acid. Next, line a colander with your clean, damp cheesecloth and place it over a large bowl. Carefully pour the curds and whey into the cloth. Gather the corners of the cloth, twist to seal, and gently squeeze out as much whey as possible. To remove any lingering taste from the acid, you can rinse the bundle of curds under cold water.
Pressing and Storing for Freshness
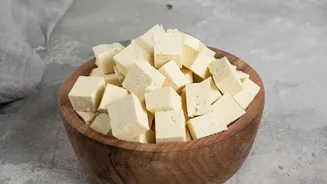
To form the block of paneer, place the cloth-wrapped bundle on a flat plate or colander. Put another plate on top and add a heavy weight, like a cast-iron skillet or a few cans of food, to press out the remaining liquid. Let it press for at least one to two hours, or up to four hours for a firmer block. Once the paneer is firm, unwrap it. It is now ready to be used. If you are not using it immediately, store it properly to maintain its safety and freshness. Homemade paneer should be placed in an airtight container and refrigerated promptly. It is best consumed within two to three days. For longer storage, you can freeze it for up to three months.