




The Science of the Perfect Puff
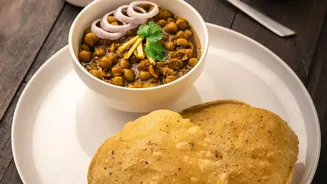
Ever wondered what magic turns a flat disc of dough into a glorious, balloon-like poori? It’s not magic, but science. When you make the dough, water gets trapped within the flour's gluten structure. The moment this dough hits hot oil, the moisture on the surface
evaporates, and the outer layer cooks almost instantly, creating a seal. The trapped moisture inside then rapidly turns to steam. This steam has nowhere to go, so it exerts pressure from within, pushing the surfaces apart and causing the poori to swell and puff up. This entire process happens in seconds, and it’s the secret behind that satisfyingly light and airy texture.
Why Width Is Your Kadai’s Superpower
Here is where the headline's wisdom comes into play. A poori needs unrestricted space to puff up evenly. When you slide a poori into a narrow pan, its edges can hit the sides as it tries to expand. This contact can cause it to fold or crease, preventing a full, uniform puff. A kadai, with its wide, open surface, provides the ideal environment. It allows the poori to float freely and expand in all directions without obstruction. Think of it as giving the poori its own swimming lane. This freedom is crucial for achieving that perfectly spherical shape every single time.
Depth and Material Also Matter
While width is key for space, the depth and material of your kadai are just as important for heat management. Deep-frying requires a stable, high oil temperature. A heavy-bottomed kadai, particularly one made of cast iron or tri-ply stainless steel, is excellent at retaining heat. This means that when you slide a poori in, the oil temperature doesn't drop drastically. Consistent heat is vital; if the oil is too cold, the poori will absorb excess grease and become soggy instead of puffing. If it's too hot, it will burn on the outside before cooking through. A deep, heavy kadai helps you maintain that perfect temperature sweet spot for crisp, light, and non-greasy results.
It's Not Just About the Pan
A great kadai sets the stage, but the star of the show is still the dough and your technique. To ensure success, focus on a few other critical factors. First, the dough must be firm and stiff—tighter than a chapati dough. A soft dough will absorb too much oil. Second, don't over-rest the dough; 15 to 20 minutes is usually sufficient to relax the gluten without making it too slack. Third, roll the pooris to an even thickness. If they are too thin, they won't have enough internal moisture to create steam; too thick, and they won't cook through. Lastly, never use dry flour for rolling, as it burns in the hot oil and spoils its taste and colour. A little oil on the rolling surface works perfectly.
Mastering the Frying Technique
With your perfect dough and ideal kadai, the final step is frying. Ensure your oil is hot enough by dropping a tiny piece of dough into it; it should sizzle and rise to the surface immediately. Gently slide the rolled-out poori into the oil from the side of the kadai. As it starts to rise, use a slotted spoon to gently press it down into the oil. This motion encourages it to puff up beautifully. Some cooks also spoon hot oil over the top to help it inflate evenly. Once it has puffed, flip it over and cook for another 10-15 seconds until it’s golden brown. The whole process for one poori should take less than 30 seconds.