




Start with Smart Preparation
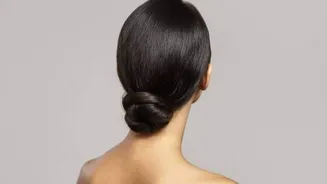
A secure bun begins before you even start twisting. The texture of your hair plays a huge role in its ability to hold a style. While a bun can be done on clean hair, it holds best with a bit of grip. If your hair is freshly washed and silky, it's more
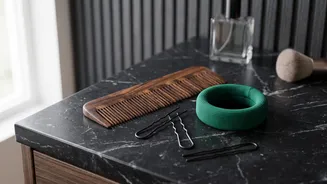
likely to slip. A light mist of texturizing spray or a sprinkle of dry shampoo at the roots can add the necessary grit. Then, reach for a fine-tooth comb. This isn't just for detangling; it's for creating a smooth, uniform base. Combing your hair into a sleek ponytail ensures there are no bumps or loose sections that can later become weak points in your bun. For updos, combs made from acetate or wood are often recommended over plastic, as they create less static and are gentler on the hair.
Choose a Champion Hair Tie
The hair tie is the foundation of your bun, and a weak foundation will cause the entire structure to crumble. A flimsy, stretched-out elastic is often the first point of failure. For a bun that needs to last, especially with thick or heavy hair, you need a hair tie designed for strength. Look for options specifically marketed for thick hair, which often feature seamless designs to prevent snagging and a more robust elasticity that doesn't give out. Some modern designs even use buckle mechanisms to lock the tie in place, eliminating slippage entirely. The goal is to create a tight, secure ponytail as your anchor without causing pulling or discomfort.
Master the Art of Pinning
Here is where most people go wrong. Simply shoving pins into the bun randomly will not secure it. It’s crucial to understand the difference between pin types and how to use them. For creating structure, U-shaped hair pins are a professional favourite. Unlike bobby pins, which work by clamping a small section of hair, U-pins are designed to weave through the hair and anchor the bun to the base hair on your scalp. The most effective technique is to 'scoop and lock': catch a piece of hair from the outer edge of the bun with the U-pin, then angle it down to catch the base hair against your scalp, and finally push the pin in. This creates a locking mechanism that is far more secure than the simple friction grip of a bobby pin.
The Difference in Pins
While bobby pins are great for tucking away stray flyaways or securing small, flat sections, they are not built to support the weight of an entire bun, especially in thick hair. Their tight, V-shaped design works by compression and can sometimes pinch the scalp. U-pins, also known as French pins or chignon pins, are longer and have an open shape that distributes tension more evenly. They slide into the hair smoothly without pulling and can hold a much larger volume of hair. For a really dense bun, you may need a larger, stronger 'power pin' designed specifically for heavy hair. There are also spiral or twist pins, which you screw into the bun to provide an all-around hold.
Finishing for All-Day Hold
Once your bun is formed and securely pinned, a few final touches can make all the difference. Use your fine-tooth comb again to gently smooth any loose hairs or flyaways around your hairline for a polished finish. Then, a light mist of a strong-hold hairspray will help lock everything in place, providing an extra layer of security against movement and humidity. Before you walk out the door, give your head a gentle shake. If you feel any significant wobbling or loose spots, add another strategically placed U-pin to reinforce the area. A truly secure bun should feel like a part of your head, not a delicate accessory perched on top.