


Understanding the Pachadi Puzzle
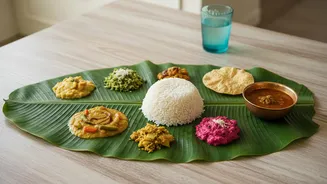
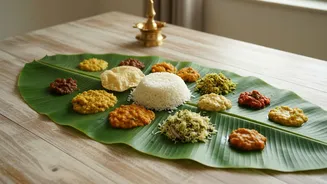
Pachadi is a traditional South Indian side dish, similar to a raita, that holds a special place on the Sadya banana leaf. Typically made with a base of yogurt and ground coconut paste, it can feature a variety of vegetables or fruits, from crisp cucumbers
to sweet pineapples. The beauty of the Sadya lies in its variety, and serving two or three different pachadis is common. The challenge isn't in the complexity of one recipe, but in the logistics of preparing several at once, each with its own unique flavour profile, ranging from sweet and sour to spicy. A good strategy is key to avoiding kitchen chaos.
Strategy 1: Group and Conquer
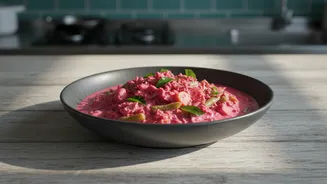
Before you begin cooking, group your chosen pachadi recipes by their preparation method. This is the most effective way to streamline your workflow. A logical way to categorise them is by 'cooked' versus 'raw'. Cooked pachadis, like those made with beetroot or pineapple, require simmering the main ingredient before adding the yogurt base. Raw pachadis, such as a classic vellarikka (cucumber) pachadi, are much quicker and involve simply mixing the grated vegetable with the base. By identifying which pachadis need cooking time, you can plan your sequence of tasks more efficiently, starting with the cooked varieties first.
Strategy 2: Master the Base Paste
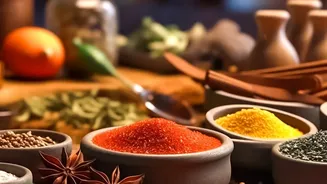
Many pachadi recipes share a common foundation: a smooth paste of grated coconut, green chillies, and cumin seeds. Some variations also include mustard seeds for a pungent kick. Instead of grinding a separate small batch for each pachadi, make one large batch of this base paste. You can then divide it among your different pachadi preparations. This single step saves a significant amount of time and reduces cleanup. For a pineapple pachadi, you might use the base as is; for a beetroot pachadi, you might add an extra chilli to the mix for more heat. This 'master paste' approach ensures consistency and efficiency.
Strategy 3: The Art of Pre-Preparation
A stress-free Onam Sadya begins a day or two before the festival. Much of the work for pachadis can be done in advance. Chop your vegetables—like pineapple, beetroot, or ash gourd—and store them in airtight containers. You can grate the coconut required for all your dishes. The base coconut paste can also be prepared a day ahead and refrigerated. Even the yogurt can be whisked and kept ready. Breaking down the tasks means that on the day of Onam, you are primarily assembling the dishes rather than starting every single component from scratch. Some cooks even fry papadums and prepare pickles like inji puli days in advance.
Strategy 4: A Streamlined Cooking Flow
On the day of the feast, your pre-preparation will pay off. Start by cooking the vegetables for your cooked pachadis, such as beetroot or pumpkin. While they simmer and then cool—a crucial step before adding yogurt to prevent it from splitting—you can assemble your raw pachadis. Mix your pre-chopped cucumber with the base paste and prepared yogurt. Once the cooked vegetables have cooled to room temperature, you can finish those pachadis by stirring in the yogurt. The final step for all of them is the tempering, or 'tadka'. A smart hack is to prepare the tempering in one large batch by heating coconut oil, sputtering mustard seeds, and frying curry leaves and dried red chillies, then distributing it across all your finished dishes.
Quick Pachadi Ideas for an Easy Win
If you want to add variety without significant extra effort, include one or two very simple options. A basic tomato pachadi involves briefly sautéing chopped tomatoes until soft before mixing them with the yogurt base and tempering. Another easy choice is a vendakka (okra) pachadi, where sliced okra is fried until crisp before being added to the yogurt, offering a wonderful textural contrast. These simple additions can expand your Sadya spread, making it feel more elaborate with minimal additional labour.