

Your Candle-Making Toolkit
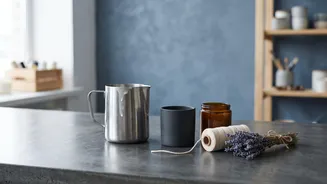
Before you begin, gathering the right supplies will make the process smooth and safe. You don't need a lot of complex equipment, but using the correct tools is crucial. You will need: wax flakes (like soy or beeswax), pre-waxed wicks with metal tabs,
heat-proof containers, a melting pot and a larger pot to act as a double boiler, a kitchen scale for accuracy, and a thermometer to monitor wax temperature. To hold your wick in place, you can use a simple clothespin or a specialized wick-centering tool. While optional, fragrance oils specifically designed for candles and liquid dyes can add a personal touch.
Choosing the Right Wax
The type of wax you choose affects your candle's appearance, scent throw, and burn time. For beginners, soy wax is often recommended because it's eco-friendly, burns cleanly, and is forgiving with temperature. Paraffin wax is a classic choice known for holding vibrant colors and strong scents exceptionally well. Beeswax is a natural, premium option with a subtle honey scent of its own, but can be more expensive. Coconut wax and coconut-soy blends are also gaining popularity for their clean burn and excellent scent throw. Start with a single type of wax in a small quantity to see what you enjoy working with before buying in bulk.
The Core Safety Rules
Safety is the most important part of candle making. Because you're working with hot wax and potentially an open flame, these rules are non-negotiable. First, never leave melting wax unattended. Always use a double boiler to melt wax; never place your melting pot directly on a heat source, as this can cause the wax to overheat and become a fire hazard. Monitor your wax temperature with a thermometer. Keep your workspace clean, organized, and free of flammable materials like paper towels or curtains. It is also recommended to wear protective clothing like an apron, closed-toe shoes, and safety goggles to protect yourself from splashes. Finally, always work in a well-ventilated area.
Step-by-Step: Pouring Your First Candle
With your supplies gathered and safety in mind, you're ready to create. First, prepare your container by washing and drying it thoroughly. Secure the wick to the bottom center of the container using a wick sticker or a dab of hot glue. Next, measure your wax flakes using a scale. As a general rule, you'll need about twice the volume of your container in wax flakes. Set up your double boiler and melt the wax over medium heat, stirring gently. Once the wax is fully melted, use your thermometer to check the temperature according to your wax's specific instructions. Remove from heat and stir in your fragrance oil. Let the wax cool slightly to the recommended pouring temperature before slowly pouring it into your container. Center the wick at the top using a clothespin or holder and let the candle cool completely for several hours, or even overnight.
Curing, Trimming, and Troubleshooting
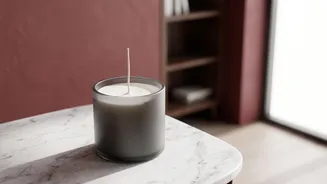
Patience is key after pouring. Most natural waxes, like soy, require a 'curing' period of one to two weeks for the fragrance to fully bind with the wax, ensuring a strong scent when burned. Before you light your candle for the first time, trim the wick to about a quarter of an inch. This prevents smoking and an overly large flame. Common beginner issues include 'tunneling' (where only the center of the candle burns down), which is often caused by a wick that's too small for the container's diameter. An off-center wick can also cause uneven burning. Rough tops or 'frosting' on soy candles are common cosmetic issues that can often be fixed by adjusting pouring temperatures.