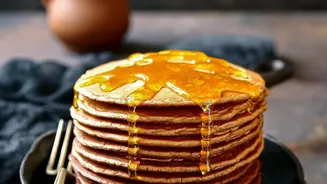


Understanding Your Star Ingredient
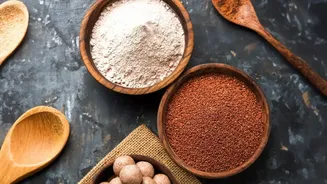
Before you even mix your batter, it’s crucial to understand what makes ragi, or finger millet, unique. Ragi is a nutritional powerhouse, celebrated for being rich in calcium, iron, and fibre. However, the most important characteristic for this recipe
is that ragi flour is naturally gluten-free. In conventional pancakes made with wheat flour, gluten creates a protein network that provides structure and elasticity, helping the pancake hold its shape. Without gluten, ragi pancakes are inherently more delicate and prone to breaking. This isn’t a flaw; it just means they require a slightly different technique to master.
Building a Better Batter
A successful ragi pancake begins with a well-constructed batter. Because ragi lacks gluten's binding power, the consistency of your batter is critical. A batter that is too thin and runny won't have enough structure to hold together when cooked. Aim for a batter that is pourable but thick, slightly more so than a traditional wheat pancake batter. To enhance structure and prevent crumbling, consider adding a natural binder. A mashed ripe banana not only adds sweetness and moisture but also helps hold the batter together. An egg can also provide essential protein and structure. For those not strictly gluten-free, incorporating a small amount of whole wheat flour (atta) can also improve the texture and binding. Finally, letting your batter rest for five to ten minutes before cooking allows the flour to fully hydrate, resulting in a better texture.
The Art of the Flip
This brings us to the most critical moment: the flip. The headline tells no lies. You must wait until the edges start to set. This is the ultimate visual cue that the pancake has developed enough of a cooked structure to survive being turned over. Rushing this step is the number one reason for breakage. So, what exactly should you look for? First, watch for bubbles to form across the surface of the pancake, not just at the edges. Second, and most importantly, those bubbles should begin to pop and leave small, open holes that don't immediately fill back in with batter. At the same time, the edges of the pancake will start to look dry and may even pull away from the pan ever so slightly. When you see these signs, you can flip with confidence. Use a thin, wide spatula, slide it completely underneath the pancake, and flip in one smooth, decisive motion.
Essential Cooking Conditions
Beyond the flip, your cooking environment plays a major role. Temperature control is key. A pan that's too hot will burn the outside before the inside has a chance to set, leading to a burnt and broken pancake. Conversely, a pan that isn't hot enough will cause the pancake to cook too slowly, resulting in a tough texture. The sweet spot is medium to medium-low heat. Always preheat your pan fully before pouring the batter. A good non-stick pan is your best friend here, and don’t be shy with the cooking fat. A light coating of ghee or butter not only prevents sticking but also helps create a delicious, crispy edge. Lastly, consider making your ragi pancakes slightly smaller than you would with wheat flour. Smaller pancakes are lighter and structurally less demanding, making them significantly easier to flip successfully.