






Know Your Unwanted Guests
The first step in tackling any pest problem is to identify the culprit. In Indian kitchens, the most common invaders are small beetles and moths. You might encounter rice weevils, which are tiny beetles with long snouts, often found in whole grains. Flour
beetles are another frequent offender, infesting everything from atta and maida to cereals and spices. Perhaps the most noticeable is the Indian meal moth, which you may see fluttering around your kitchen at night. It’s not the adult moths that cause damage, but their larvae, which spin silky webs as they contaminate food products like grains, nuts, and even dried fruits. Signs of an infestation include the insects themselves, fine webbing in packaging, strange clumping in flour, or a sawdust-like powder on your shelves.
Why Your Pantry is a Pest Paradise
Pantry pests thrive in environments that offer food, warmth, and moisture. Unfortunately, a typical kitchen pantry often provides all three. Most infestations begin when pests hitch a ride from the grocery store. Eggs or larvae can be hidden inside paper bags, cardboard boxes, or thin plastic packaging. Once inside your home, they find a perfect breeding ground. Spilled crumbs, forgotten packets of spices at the back of a shelf, and loosely sealed bags provide an ongoing feast. Warm, humid conditions, common in many parts of India, can accelerate their life cycle, allowing a small problem to multiply quickly. The pests contaminate far more food than they consume, leaving behind droppings, shed skins, and webbing that can spoil entire containers of food.
Step 1: The Great Pantry Clean-Out
Once you’ve spotted a pest, you must act decisively. Begin by emptying your pantry completely. Inspect every single food item. Be ruthless and discard any package that shows the slightest sign of infestation, including tiny holes in the packaging, webbing, or visible insects. Do not try to salvage the contents. Place all infested items in a sealed bag and remove it from your house immediately. Next, vacuum all the shelves, paying close attention to corners, cracks, and crevices where eggs or larvae may be hiding. After vacuuming, wash the shelves thoroughly with soap and water or a vinegar solution to remove any remaining food residue and kill any lingering pests. Ensure the shelves are completely dry before you restock them, as moisture encourages mould and mites.
Step 2: Smart Storage is Your Best Defence
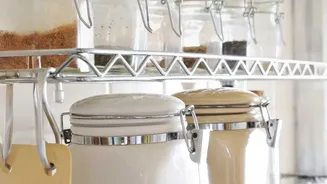
The original packaging your food comes in—paper, cardboard, or thin plastic—is not pest-proof. Determined insects can easily chew through these materials. Your most effective long-term strategy is to transfer dry goods into airtight containers immediately after purchase. Opt for containers made of glass, metal, or thick, sturdy plastic with tight-fitting lids, preferably with a silicone or rubber gasket to create a solid seal. This not only blocks pests from getting in but also prevents any potential hitchhikers from spreading to other foods. Using clear containers allows you to see the contents at a glance and spot any potential issues early. For items you use less frequently, consider storing them in the freezer for a few days after purchase to kill any potential eggs before moving them to the pantry.
Step 3: Prevention Through Regular Habits
Maintaining a pest-free pantry is an ongoing process, not a one-time fix. Make it a habit to wipe up spills and crumbs immediately. Adopt a “first-in, first-out” system for your groceries; store newer items at the back and bring older ones to the front to ensure they get used promptly. Before refilling your airtight containers, wash and dry them thoroughly to prevent contamination from old food particles. You can also employ some natural repellents. Placing a few dried bay leaves inside containers of flour, rice, and lentils is a traditional method that helps deter weevils and other beetles. Some people also find success with dried red chillies or whole cloves. Finally, keep your pantry cool and well-ventilated, as pests prefer warm, stagnant air.