







The Problem with One-Direction Pinning
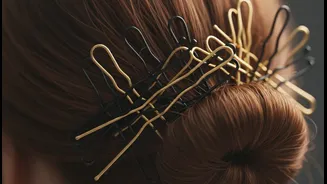
The common impulse is to wrap the hair into a bun and then push pins straight into it, parallel to the scalp. While this feels intuitive, it fails to create a strong anchor. When all pins are inserted from the same angle, they are essentially just sitting
within the coiled hair, rather than fastening the bun to the base hair on your head. This method lacks tension and structural support, making the bun susceptible to loosening from movement and gravity. Without a proper locking mechanism, the weight of the bun itself will eventually cause the pins to slip, leading to the dreaded midday collapse. A truly secure style needs more than just pins; it needs a strategy.
The Physics of a Secure Bun
Think of building a structure. To make it stable, you need support from multiple directions. The same principle applies to your hair. A secure bun relies on creating a sort of cage or internal framework with your pins. By inserting pins from different directions—top, bottom, and sides—you are creating opposing forces that lock the bun in place. Each pin should not only go into the bun but also catch the base hair on your scalp. This creates an anchor that holds the bun firmly against your head. Some stylists refer to this as creating a “plus sign” pattern with your first four pins, establishing a solid foundation before adding more for shaping.
The Multi-Directional Technique Explained
To master this technique, start by forming your bun and holding it flat against your head. Take your first pin and insert it from the top (12 o'clock position), angling it downwards into the base. Then, take a second pin and insert it from the bottom (6 o'clock), angling it upwards towards the center. Already, the bun will feel more stable. Continue by inserting pins from each side (3 o'clock and 9 o'clock), always directing them in towards the middle of the bun. This method creates a locking effect by weaving the bun and the scalp hair together from all sides. For even greater hold, you can criss-cross pins; inserting one pin and then sliding another over it in an 'X' shape to lock them together.
Choosing the Right Tools
Not all pins are created equal, and using the right one for the job is crucial. Bobby pins, which are clamped shut, are excellent for securing the edges of the bun and catching the base hair. For the firmest hold, insert them with the wavy, ridged side against your scalp. U-shaped hairpins, often called French pins, are designed for a different purpose. They are better for weaving through the bulk of the bun to hold its shape without clamping down too tightly, which is great for softer, messier styles. For very thick or heavy hair, longer and stronger pins, sometimes called spin pins, can do the work of many smaller ones by spiraling into the bun and anchoring it securely.
Common Mistakes to Avoid
One of the most frequent errors is creating the bun with too little tension before pinning. A loosely coiled bun provides a poor foundation for pins to grip onto. Another mistake is using old, stretched-out bobby pins that have lost their clamping power. If the arms of a bobby pin are spread apart, it won't hold effectively. Many people also make the mistake of only pinning the surface of the bun. To truly anchor it, the pin must pass through the outer edge of the bun and then catch the hair flat against your scalp. Finally, avoid using too many pins. An excess of pins can add unnecessary weight and may actually cause the bun to slip. Often, four to eight well-placed pins are more effective than twenty poorly placed ones.